As you may or may not know, my full time job is doing Marketing and Advertising for Furls Crochet. This year we started launching seasonal collections of yarn dyed by some of the lovely indie dyers in the fiber arts community!
For the summer, we had a bunch of fun collaborating with Becky Fetterley of Thistle & Hart, who worked up some super bright and fun colors for this summer’s Paradise Collection!
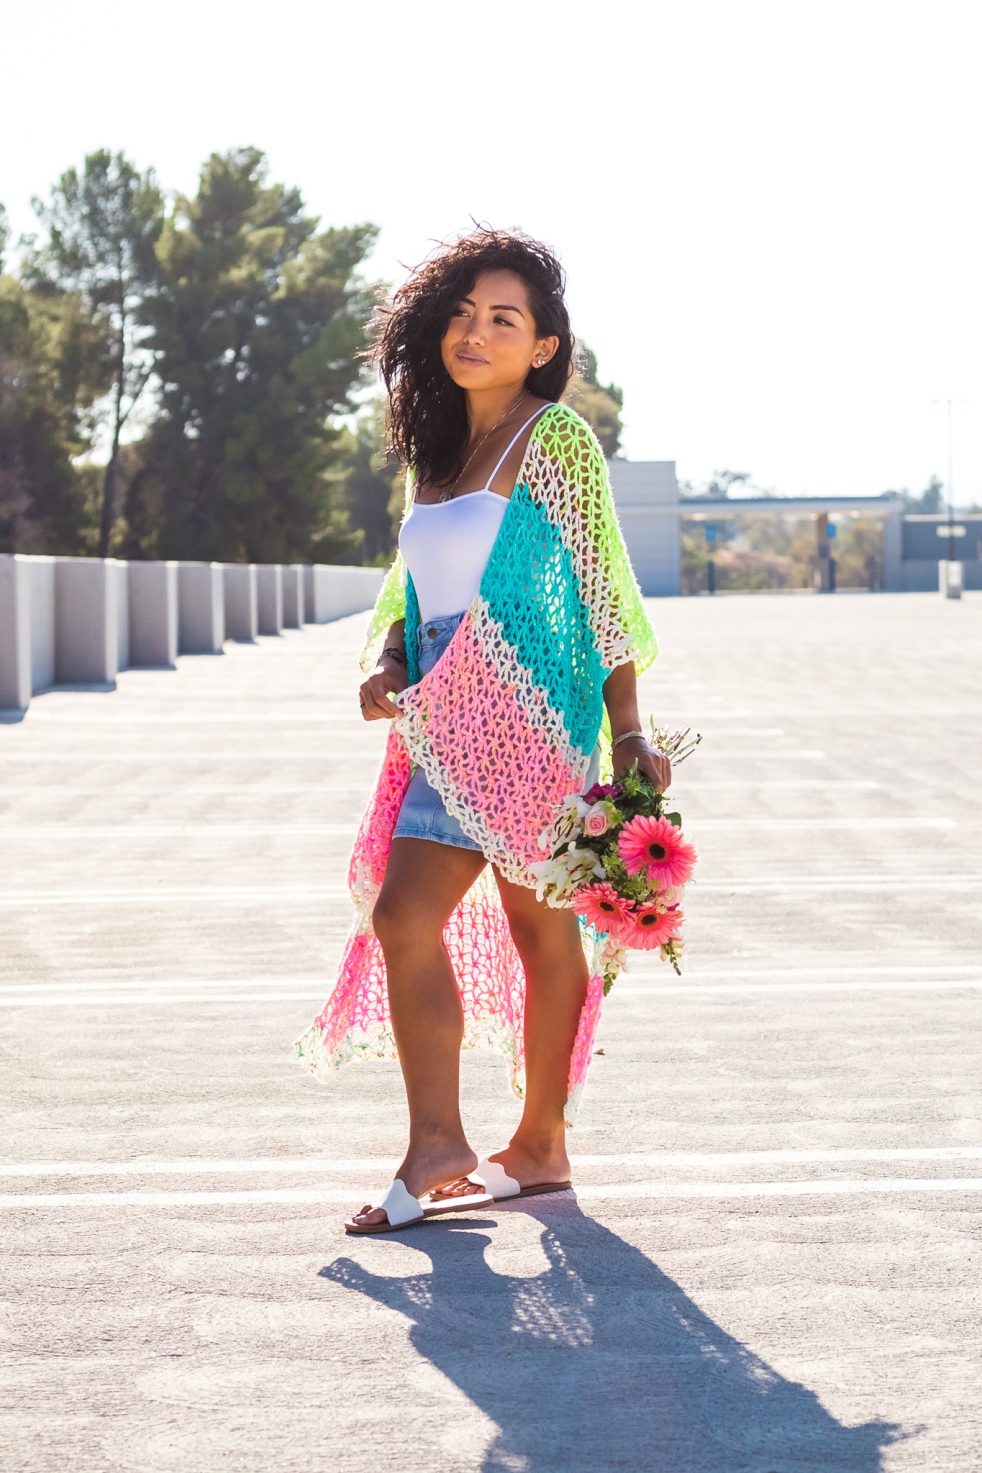
I was lucky enough to collaborate with Furls to design a new pattern for this launch! So I would like to introduce you to The Firefly Ruana!
This was a super fun project to design, not going to lie part of the fun was how easy it was hahah. It is worked in three different panels (the back and two front) and is comprised of one stitch! The only other thing there is to do is switch your colors!
Anyhoo! This pattern is available with any purchase of Paradise Collection Yarns! I hope you enjoy it!
SO, I know I have said this quite a few too many times on this blog haha, but I have been M.I.A for probably the longest I ever have on here, whoops.
As usual that has been for a myriad of reasons not limited to a work hours increase, moving to a different city, and you know just an itsy bitsy world wide pandemic.
So as I attempt to hopefully get back into the swing of things on the blog (which is actually pretty anxiety inducing), here is a little life update about why I have disappeared.
I would be very surprised if I hadn’t mentioned it in past posts, but up until the beginning of this year, we had been living in an apartment on the west side of LA and not to sound overly dramatic, I was pretty miserable.
The whole time we lived there (about 3 years) I kept telling myself that all of my problems were just in my head, and if I just tried to change the way I looked at the situation then things would get better. Unfortunately they never did. Long story short, i’m an overly sensitive person about pretty much everything, and living in not only a busy town, but a tourist town which made it exponentially more busy, my brain was constantly in overdrive.
The noise, the pollution, the population, the lifestyle, was alljust way too much. Honestly, with how loud our apartment was, I really don’t think I got a proper nights rest in the whole 3 years. I was physically and mentally drained which made it so hard to ever be productive toward anything which is why the frequency in which I was releasing patterns kept decreasing and eventually just stopped altogether.
NOW, Flash forward to earlier this year and we FINALLY moved and it was/is everything I had been wanting for years. While i was hesitant to move from my hometown for a very long time, the past few years really gave me a reality check that I was not made for a bustling city life.
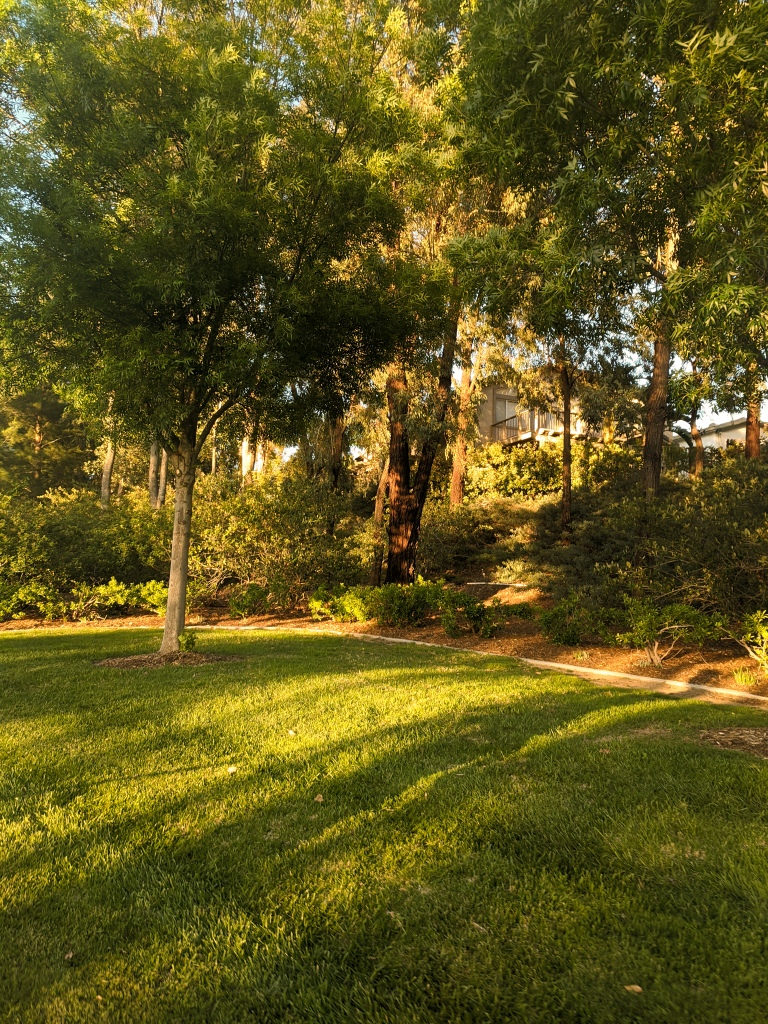
Now we live in a much less densely populated city in an actual house. I hear more birds than cars, I see more trees than buildings, and it has done wonders for my mental state, not to mention my sleep schedule (going to bed before 3 am is an actual thing now, shocking)
One of the biggest things for me moving into this house was that I now have an office, which let me tell you, has made my productivity sky rocket. It is insane what having a designated work space and not having to navigate everything you do in the kitchen will do for your productivity.
With that productivity meant putting a lot more hours into my full time job which really made any hopes of working on my own project go to the back burner, which honestly has been okay with me.
And then, just as we moved in and I started feeling lighter, happier, and more productive…the pandemic happened. While I feel more adjusted to the quarantine lifestyle than I did in the beginning, those first few months weren’t exactly easy, as I imagine they weren’t for almost anyone.
While I won’t go into too much detail about that time period, suffice to say that I wasn’t exactly in a creative mood after ” It’s just 2 weeks of quarantine” turned into 6 months. Though I did make a few things during this time…
A new maxi dress
A rapunzel wig
A tunisian headband
the chunkiest sweater ever
I suppose it’s not great to say that i’m simply just accustomed to barely leaving the house anymore, but it does beat the anxiety and depression of not being used to it that I felt in the beginning.
With that being said, I have slowly started feeling more productive and more creative again, and I think ready to try giving blogging a try again *fingers crossed I don’t eat my words*.
I don’t know exactly in what capacity I will be posting again, let alone what content I will actually be sharing as my relationship with pattern writing is incredibly strained haha, but for now I am back!
So, I am here today with my first DIY Wedding Journal! to put it simply, wedding planing went from 0-100 really fast, which is 100% my doing so at least there is that haha.
First off, you wouldn’t believe how many people ask you when the wedding is (un-ironically) the very same day you get engaged. For us, it was enough that we almost felt like we missed some memo that the wedding was supposed to be planned before the engagement haha.
While we were in Paris, I didn’t even start to think about wedding planning yet, which was nice because I didn’t want to be distracted from our trip. I honestly didn’t even think I would start any amount of the process till next year since the holidays are coming up, but it seems as if I didn’t know myself well enough.
If you know me, you will know that I get really into planning things and getting lost in every detail of research, I love it, even if it makes me feel a bit crazy sometimes.
With that being said, while thankfully we completely avoided jetlag upon our arrival to Paris, we were not so fortunate when we got home. Unfortunately, we both got sick during the trip so we didn’t have the energy or will power to force ourselves into a normal human sleep schedule. So for 5 days we were complete hermits, wide awake at odd hours long enough to play Luigi’s Mansion, and then sleeping whenever we got tired. This pattern had my mind SO far from even thinking about the wedding.
Ah but then the fog cleared, we both went back to work and started sleeping at normal hours and it was like a switch flipped and I went back to being my overly prepared self once again, needing to figure out every single minor detail before…..nothing? There is no risk involved whatsoever with me taking my time, so the feeling of urgency is just a figment of my imagination mostly haha.
My best guess is that I probably literally did 40 hours of research in 1 week…you know… like it was my job…like a normal person. Well, if those 40 hours taught be anything, it’s that (in at least California) if you want any amount of a “traditional” wedding, it’s pretty difficult to do it for anything that I would consider a reasonable price for a 6 hour party. As I started to realize the our budget would have to go up much higher than I anticipated, my immediate though was ” How can I make a mostly bare bones venue look super nice for cheap?”
I think it is going to take me quite some time to really come up with cohesive decor that I can mostly DIY, but there was one thing I knew I could do very early on, which was the 1,000 Paper Crane Tradition!
If you haven’t heard of it before, it is derived from a Japanese Legend in which it was believed that an individual who folds 1,000 paper cranes was told to be granted a wish from a god. There are several variations of how people use this traditional in modern times, one of which being a symbol for good luck and happiness in a marriage if you make 1,000 cranes for your wedding.
Neither of us are very religious, but we knew early on that we wanted to researched different traditions or symbolic ceremonial practices from different cultures and see if any of them felt like they would be meaningful to us.
This specific tradition caught my attention right away for several reasons, but I also enjoyed that it was crafty, because you know I love crafts haha. It also happened to fall right into my quest for creating decor elements that would be beautiful, but not break the bank.
The second I would tell anyone that this was something I wanted to do, most of them would stay on the side of ” Wow are you sure?” or ” Wow, you’re crazy”. If we were doing a 6 month engagement, sure it might be a little too ambitious, but we have 2 years, so I’m pretty positive I can pull it off.
It’s interesting because I get intimidated by crafts if they are too time consuming, but one of the original things that drew me to this tradition was the appeal of making something everyday. I figure if I make at least one crane a day, a couple extras when I have the time, I can do 1,000. While i love the idea of routines, I don’t actually have a standard one. I don’t have many specific activities that I do every single day, and the thought of trying to discipline myself to have the one extra task that I have to do everyday and slowly watch myself get better at really spoke to me.
I honestly have no idea why, but very early on, I subconsciously decided that planning this wedding was going to be a big opportunity to grow as a person. While Nick is completely in the loop of everything and i’m not making any decisions without him, I have taken on the role of leading 99% of the planning responsibilities.
Generally in my life, when I am working for someone else, I can put on my business face whenever need be, but when I am doing things for myself I tend to be more shy and well, a push over. I used to accept that about myself, but I have had a a big push lately in my life to know that I need to be more assertive and I think that wedding planning is going to be the best experience to learn that skill. SO I figured what better way to set the mood for the whole journey than to have my first wedding craft be one that is about discipline at its core.
SO, as I write this, I currently have about 50 cranes, so i’m not quite doing 1 a day considering I started these about 5 days ago, and i’m so sure my crane rate will slow down, but for now i’m not doing too shabby.
I am making my cranes out of regular printer paper and 4″ X 4″ squares, which means that I need to cut them to that size, and let me tell you, this little guy has been my best friend for this. If you don’t have origami paper, having something to keep your cuts straight, the right size and your hands from falling off from using scissors too much, using a paper cutting tool like this is a life saver.
I thought about making my own paper crane tutorial video for this, but let’s be honest, there are already so many and mine won’t be any better than the ones already out there (my cranes are still pretty wonky even after making 50). So here is the video I followed to learn how to make a simple paper crane.
You may be thinking, Okay 1,000 cranes, but what are you going to do with them?? My current plan is the do the same thing that is currently pretty popular, which is making a “wall” of cranes, by stringing several of them together in separate strands and have them hang down nest to each other form a kind of wall like such…
Obviously I am still in the beginning stages of this DIY, but I can’t wait to see it and share it when it is done!
It has been quite a while hasn’t it?? Well I have many reasons for that, one of them being that Nick and I recently got Engaged! and then went to Paris! I shall proceed to disperse my favorite photos from the trip throughout this post for your viewing pleasure!
I’m not going to lie, since crafting has become such an integral part of my life and identity, I have DREAMED of having a wedding for the past few years! Now of course that thrill of planning and crafting a wedding has been a roller coaster. Forever rising to the highest peaks of creative energy and then plunging into the depth of feeling completely overwhelmed by all of the creative options you have (not to mention how much they cost). Yes, if you read into that properly, I was overwhelmed by planning an imaginary wedding before I even got engaged. If that doesn’t scream Samantha I don’t know what does.
I have been with Nick for about 5 years and we have been through so much together, our relationship is very special and important to me. I know that sometimes wedding planning is exciting to brides because of the joy of planning a party. Although I do thoroughly enjoy the planning side of things, even when I have the nights where I fall into the rabbit whole of color Palettes and Chiffon vs. Organza, I still feel very grounded in not losing sight that it isn’t just a big party, but celebrating a union with someone that means a lot to me. I plan to keep that mindset the whole time.
Just in my short experience with beginning wedding planning I can see how it is really easy to get caught up in feeling obligated to do things a certain way, but no matter how many people are pressuring you to do the wedding their way, I can already see that it is super important to not let traditions and other peoples vision (unless it’s your partner) tell you what your wedding has to be.
VERY surprisingly to me, I actually have a pretty solid idea of what I want this wedding to be. This is surprising because when I was planning imaginary weddings, I often felt overwhelmed by just how many different visual styles you can focus on, throw in the factor of trying to have your vision be cohesive and it feels like a recipe for disaster. However, when the imaginary wedding became a reality, it felt like I quickly became so much more decisive , which is unheard of for me, but I love it.
Now I will be honest, there is nothing wrong with how much any individual wishes to have their wedding cost. In my most whimsical moments, had the gull to look at how much a Disney Wedding would cost, and even uttered the words ” it’s not that much” (it was that much by the way). Would I love to have a magical fairytale wedding? Absolutely. Will I have one? Actually yes, but on my terms, it doesn’t have to be a $1 Million dollar wedding for me to be happy and think our wedding is beautiful.
Planning events isn’t the only thing that I get a crazy high from, but actually budgeting and trying to find deals as well. Honestly this probably stems from trying to be overly prepared and maybe a little controlling, but I will take it if it leads to me being smart with my finances!
What is my favorite way of saving money you ask? Unsurprisingly it is always going to be a good DIY project. Now there are times when a DIY ends up being actually more expensive, but it you play your cards right and most importantly are willing to put the time in, there seems to be lots of fun things you can do with wedding decor yourself! Again, I can already tell that it is really important to pick your battles strategically.
With all of that being said. While we are trying to lock down a date and venue as soon as possible, we don’t actually plan on having the wedding till 2021. That will be about 2 years of my life working on the wedding, and while i’m eager to get married, i’m not upset about the timeline.
I have a lot of ideas for ways to get crafty for the wedding just within a little over a week of planning, so i’m sure I will come up with a lot in the next 2 years. Because this is going to be such an important and creative time in my life, I wanted to have a sort of journal for me, to look back on all of my thoughts and ideas throughout the process, as well as a resource for other people.
Now I know there is no shortage of wedding planning resources out there and this is going to be anything super comprehensive, but just some DIY projects that I end up working on for this whole process. Some will be super simple or just informative, and others will be too ambitious haha but it’s a journey! If anyway chooses to follow me along on this journey, i hope you have fun!
It has been interesting to try to come up with title names for these blog posts since sewing patterns don’t have names but just a number code. Anywhoo! I’m back with another sewing pattern review!
I’ve incredibly behind on my sewing projects for no reason other than I have been pretty unmotivated, which honestly is nothing new. My craft room is also out bedroom so sometimes everything feels so cluttered and its hard to find actual adequate space just to cut fabric. So part of me just feels like waiting to work on project until we move, but where is the fun in that?
Im slowly getting back into the routine of trying to work on some kind of project everyday, so i’m finally sharing my (rather short) review for another McCalls Sewing Pattern!
Choosing the Pattern and Fabric
It’s actually really funny because I was just reading my last review and I said I “Wanted to focus on making tops for a while” and then apparently went right back to making dresses. Sounds just like me!
I have really been having a personal battle of trying to have a simple wardrobe that isn’t too bold or extravagant, and just having a mix of different styles since there are so many different things I enjoy wearing.
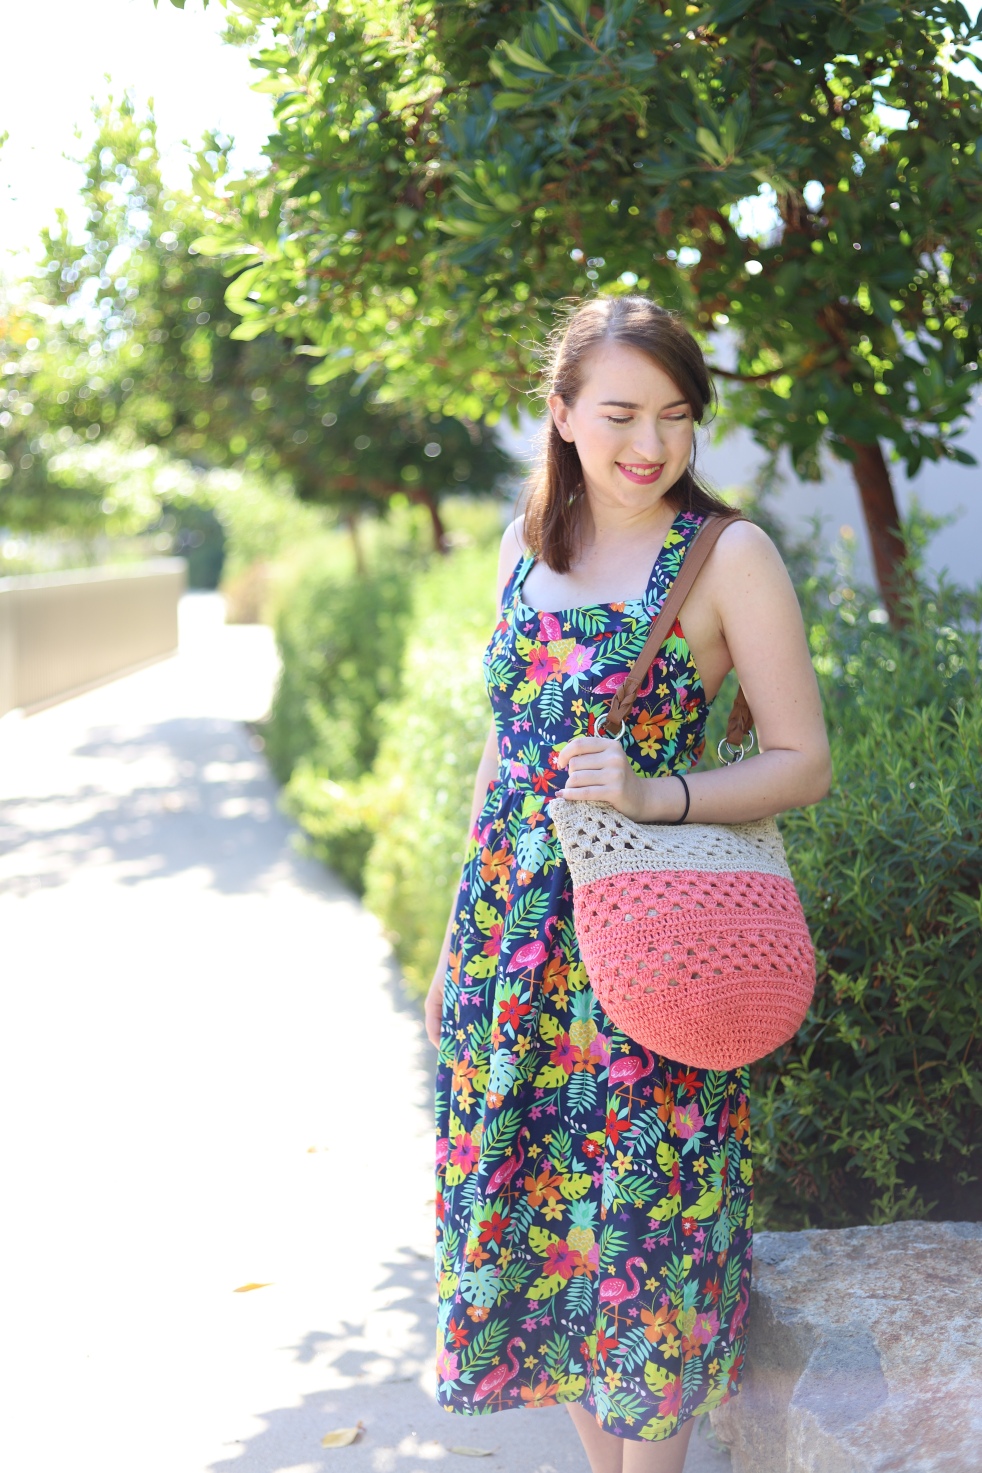
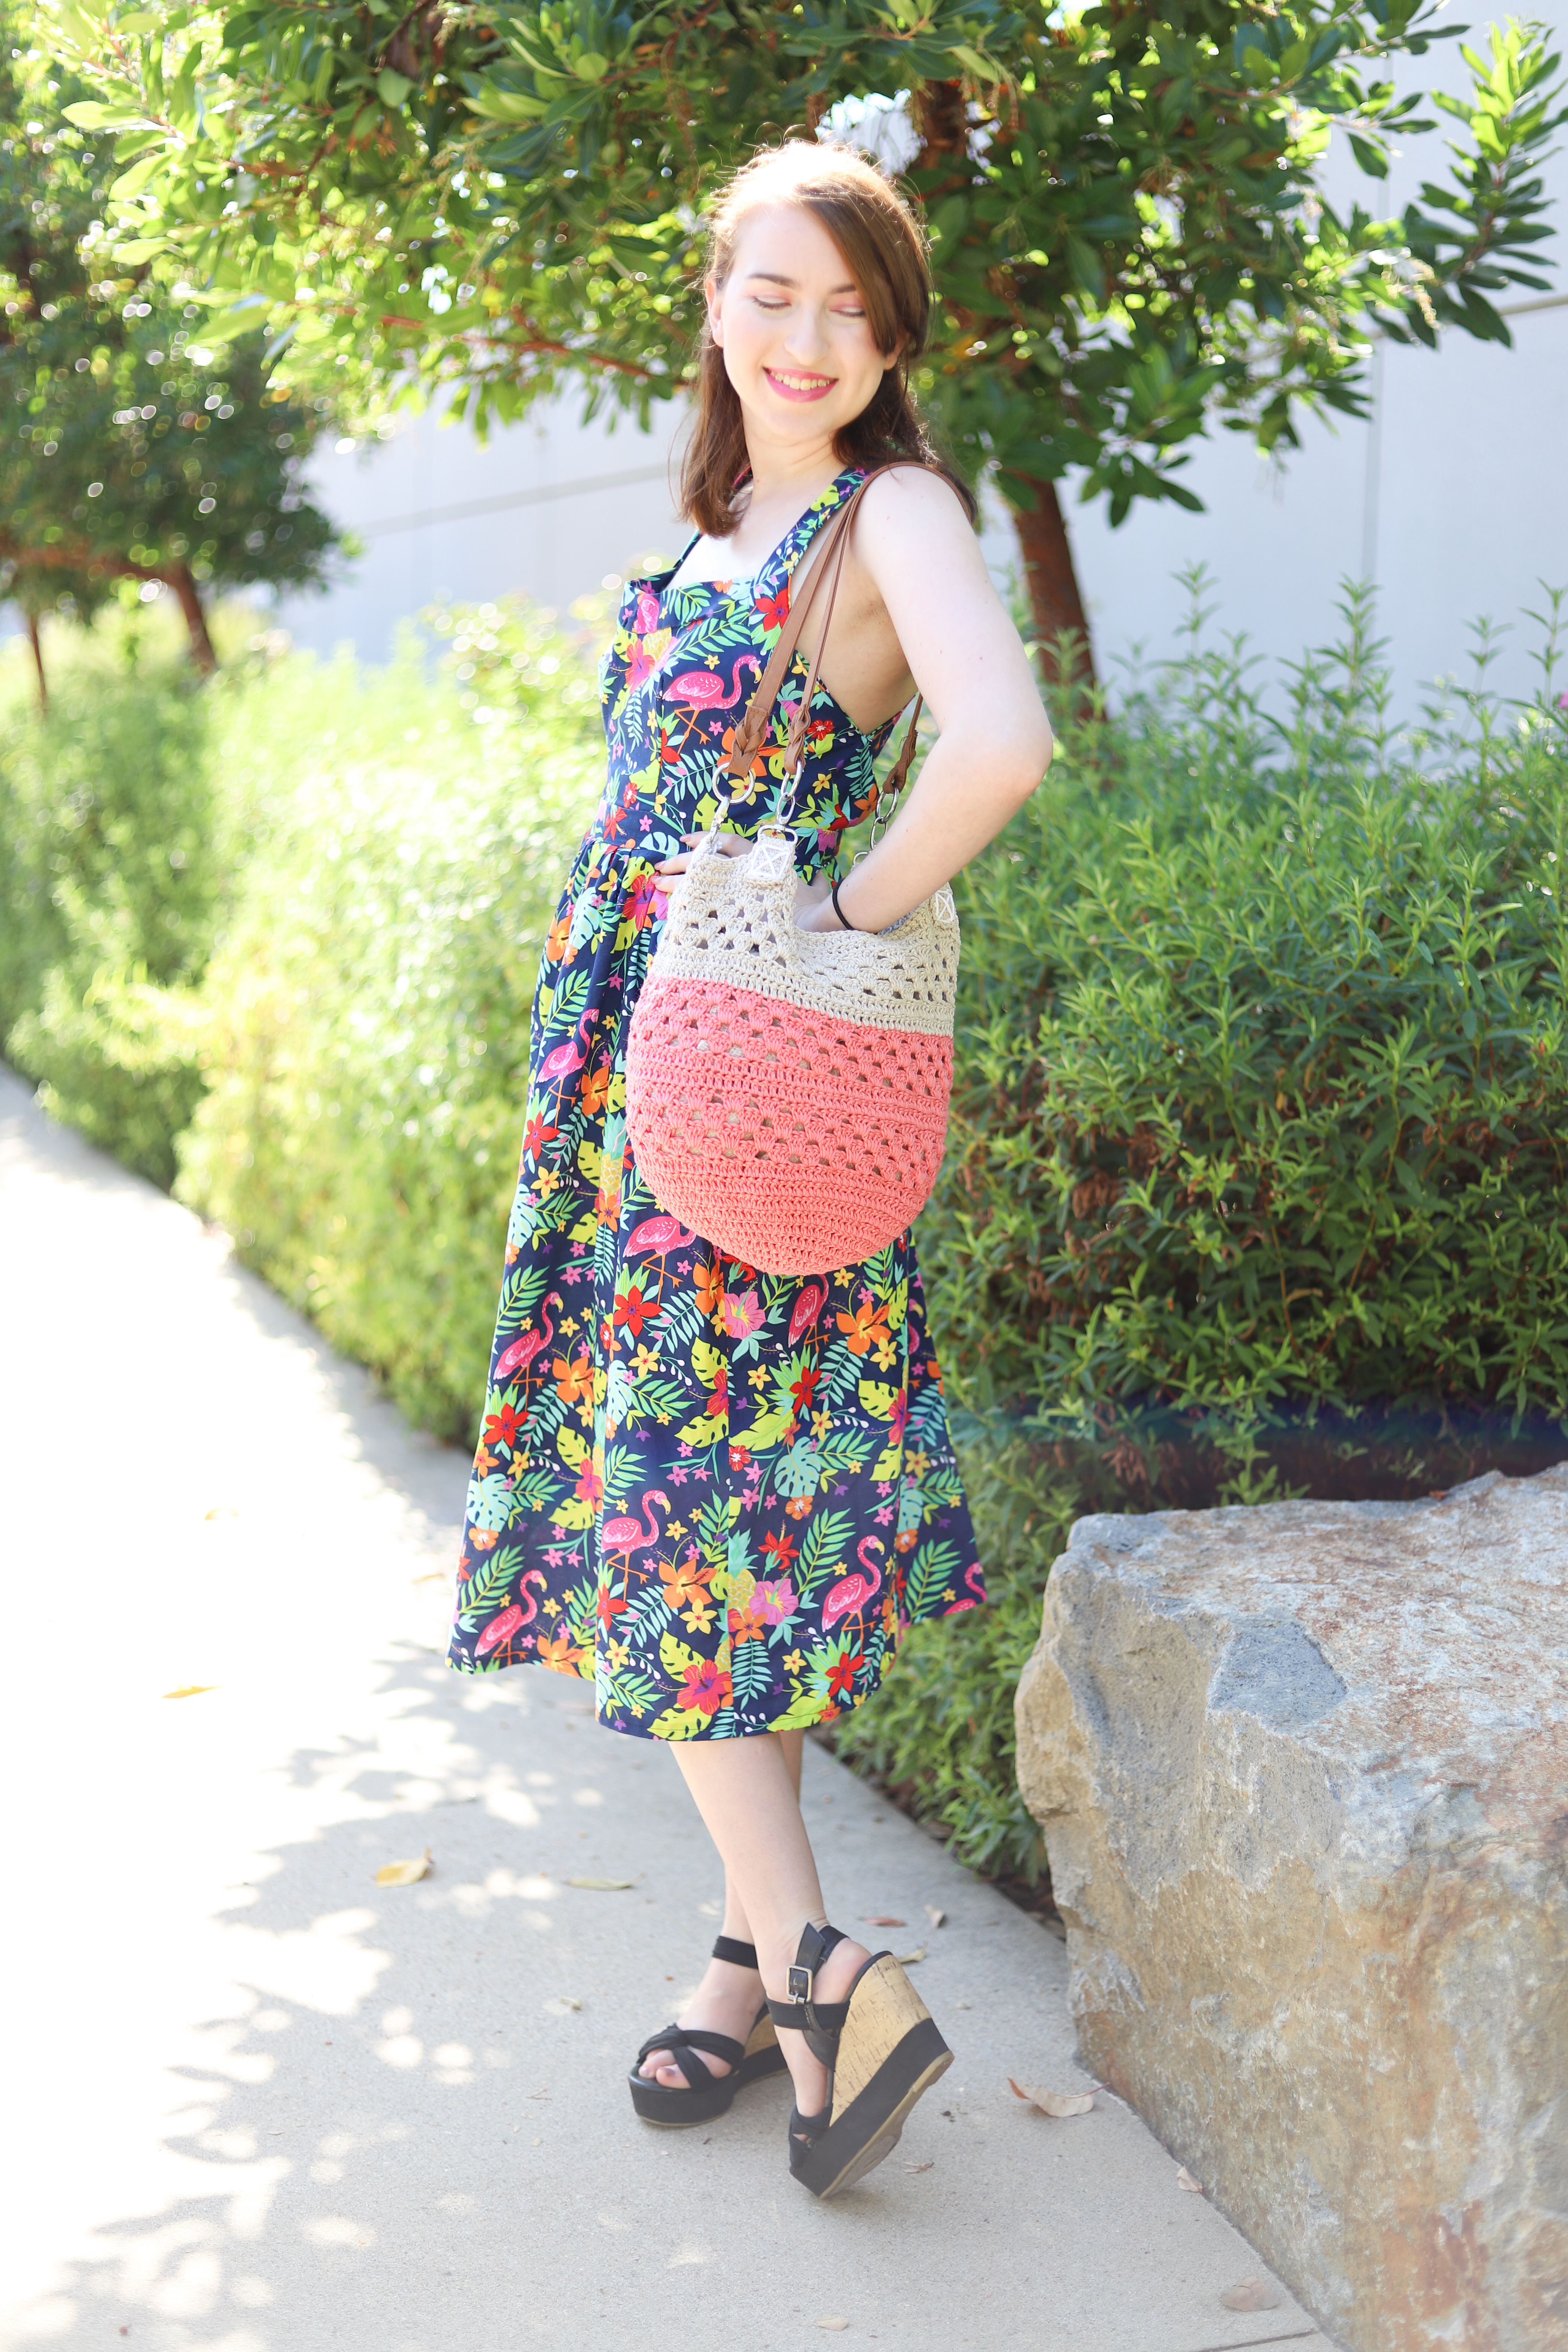
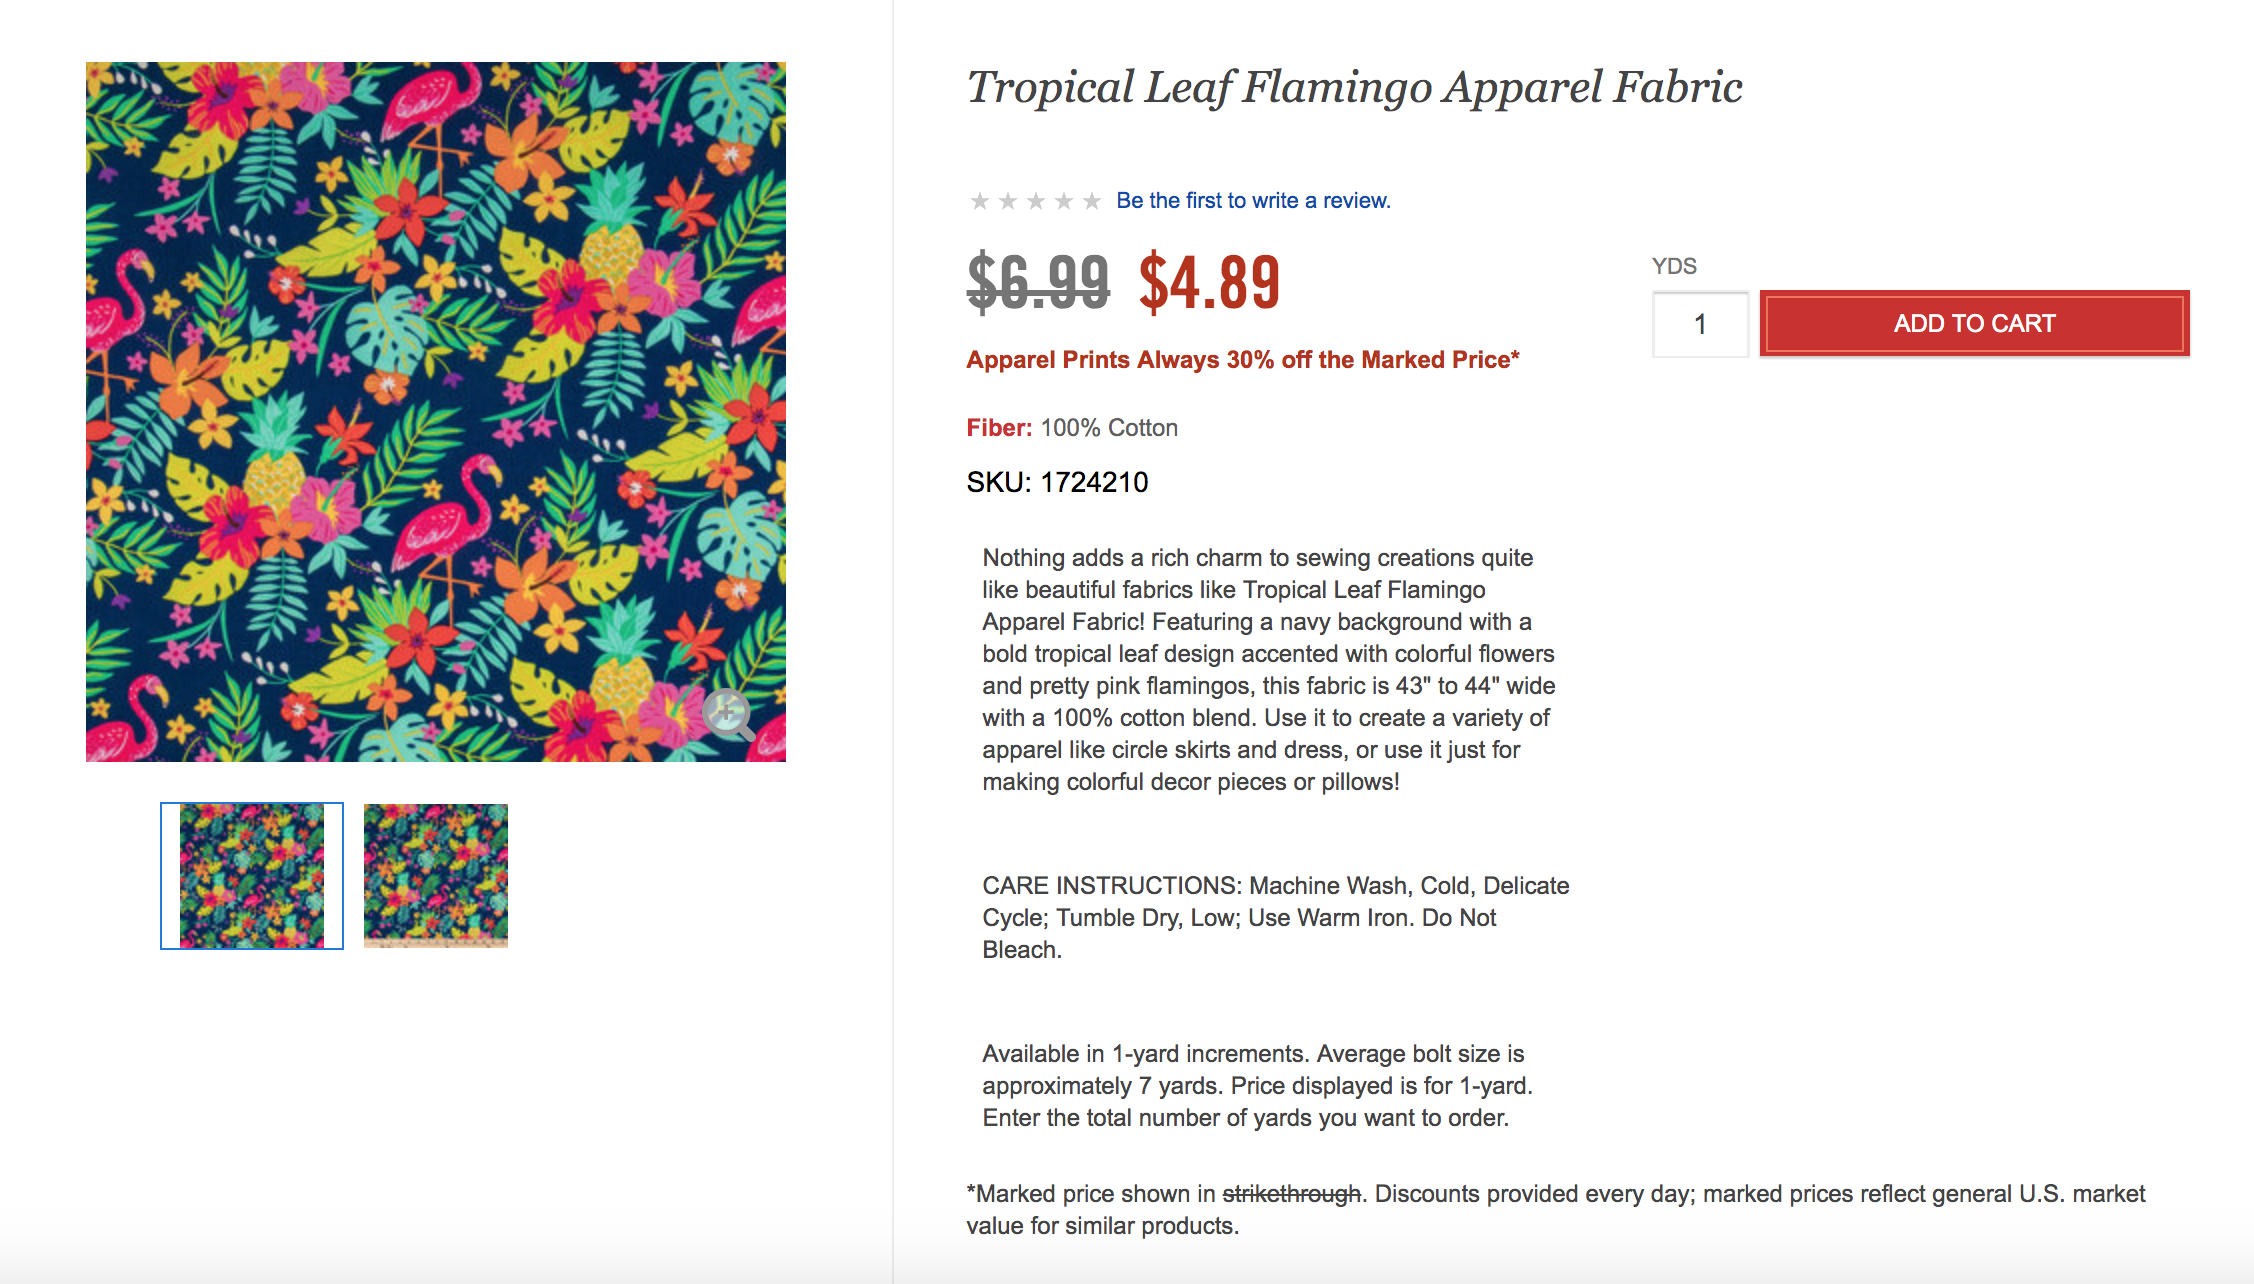
This time I let myself go bold, with this super bright tropical pattern, it was too cute and happy for me to pass it up! I picked it up from Hobby Lobby, which I think has some pretty unique cotton fabrics that you don’t see at places like Joann.
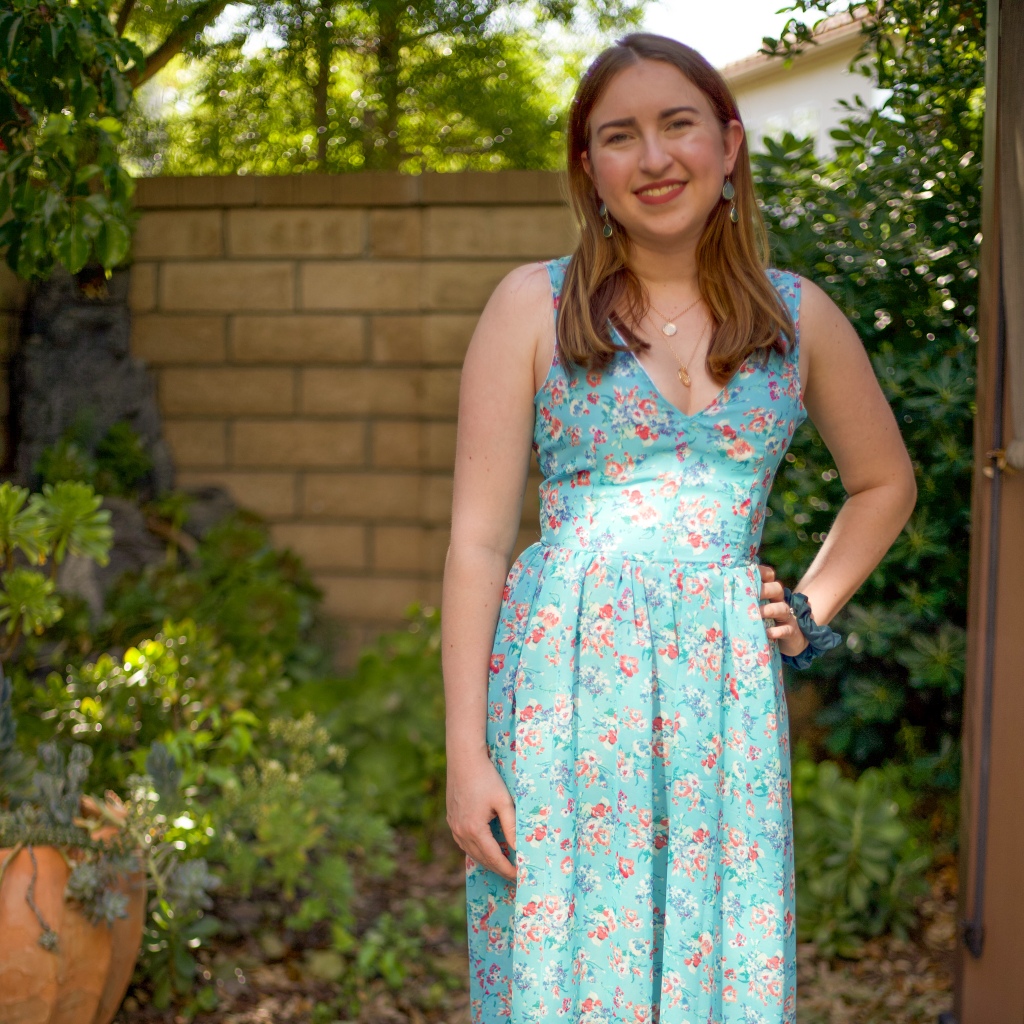
I chose to pair this adorable fabric with the McCall’s Pattern # M7952. Which in my opinion is kind of a 50’s style dress that would go well with any bold pattern.
Initial Thoughts
Upon just looking at the pattern packaging, i didn’t really have reason to think this pattern would be too difficult. It had a few construction elements I hadn’t tried yet, which is to be expected since I haven’t been sewing for very long haha.
One of the first things I do, which I think is pretty standard haha, is take out the written instructions and read them over to familiarize myself with the process of making the item before I start. This also allows me pin point any steps I think I may have a hard time with.
Upon reading through the instructions, nothing really struck me as being super complicated although it took me a couple minutes to decipher the fabric cutting layout, which I usually tweak a little bit anyway.
I always like to save as much left over fabric as I can, so if I can rearrange the cutting layout to save a little more fabric i usually try to do that.
Construction
This pattern is pretty straight forward, unlike other patterns it doesn’t have a wide variety of different styles included, it is just slightly different versions of the same dress to suit your preference.
Overall, the instructions are very easy to follow, there really aren’t any curveballs which is why this review is going to be so short haha.
This was however the first time I ever did button holes! I was actually pretty scared to give it a try, but I am happy to report that if you feel the same button anxiety as I did, it is really easy! (and actually kind of fun). honestly the sewing machine really just does all the work for you once you mark where the button holes need to be.
I was happy that there were buttons instead of a zipper, although I have kind of gotten over my fear of zippers, I still like to avoid them when possible (which isn’t often haha). The buttons also give the dress a lot of character and you can have a fun little pop of color and get as creative as you want with the button design.
Hiccups
While the pattern itself was easy to follow, I did have a couple little hiccups during the construction process.
Pattern Pieces – This could just be because I am a beginner, but there were 2 or 3 pattern pieces in which the cut lines were rather confusing to know where to follow. From a beginner’s eye, it wasn’t immediately intuitive, so in the end I just kind of winged it, but I think I got it right??
Interfacing – Literally the first step is to iron interfacing onto all of the bra pieces and I went ahead and completely forgot to do it. I’m sure it would have been useful to have, but I still think my top looked good and felt stable and comfortable without it
Bow Hem – The second step is to sew a narrow hem onto the front bow overlay. I thought that this part seemed weird because the drape of bows is unpredictable, so you would likely have times where the wrong side of the fabric would be showing when you wear the top. I thought maybe there was an extra step later to address that, but there wasn’t. So if you have a problem with the wrong side of the fabric and the hem being visible, I would get a little extra fabric and have the bow be double sided, it may add a little bit of bulk, but i’m sure it would be fine.
Fabric Pattern – Again this is probably because I am a beginner, but if you have a single direction pattern, be sure to really pay attention to how you attach the pieces. I attached the opposite pieces quite a few times which cause some of the waves to be upside down and had to do a lot of seam ripping and restitching to fix it. Don’t be like me haha.
Straps – When I tried to measure how long i needed my straps to be, I tried them on with my posture being” proper”, however, in most cases I don’t actually stand that straight, so once I sewed them on, they were far too loose when I naturally slouched a little. So make sure you test our your strap length a couple times before you sew them on.
Final Thoughts
Though my execution of this pattern wasn’t perfect, ie there are inside parts that aren’t sewn into place that you can’t see, but I have yet to hand sew them in; this is still one of my favorite things that I have sewn so far!
I absolutely love this fabric pattern and I think the dress pattern really fits my personal style. I highly recommend both the fabric and the sewing pattern!
I ordered a bunch of McCall’s patterns recently because they were have a huge sale where patterns that were normally $20 were only $4! So I will have plenty of new sewing projects to share with you soon!
Hello everyone! Today I’m sharing my finished Mickey Mouse Picnic Blanket Skirt! I must admit that a tiny part of me thought that sewing would be less stressful than crochet can sometimes be, not that crocheting itself is stressful, but creating your own patterns definitely is.
I really don’t have enough knowledge about making clothes in my repertoire, so I knew that if I started sewing I would be following other patterns and wouldn’t have to stress about coming up with my own. While it has been nice to follow patterns where, hallelujah the math is already done for me, sewing isn’t quite a walk in the park.
It has been incredibly exciting picking out patterns and fabrics that I feel really suit my style and reflect my personality and interests. There have been plenty of times in my life where I envision a piece of clothing that I would love, but simply doesn’t exist.
Since this is me we are talking about, it is not at all surprising that I am always on the lookout for cute Disney fabrics! However, I am finding it challenging to find ones that leans more on the mature side (which honestly, I don’t know what I expected haha). So when I saw this plaid Mickey fabric at Hobby Lobby that wasn’t over the top tacky I knew I had to get it!
Right before I had found this fabric, I had also found The Picnic Blanket Skirt Pattern by Tilly and The Buttons, I immediately knew that this fabric would be perfect for it! Her pattern is free and oh so cute (and simple!).
The instructions tell you everything you need to know about getting your own measurements to make the skirt from scratch. I found it super straight forward and easy to follow, but the only thing that I personally decided to do differently was to forgo the pockets. I know, i know, I had the option to add pockets to something I didn’t?? Trust me, I would have, but I ended up not having enough fabric because I just guessed about how much I would need when I bought it. Learn from my mistakes and go to the store already knowing how much fabric you will need haha!
I’m super happy with how it turned out and that I can rock a little bit of my Disney love without looking like I don’t know that i’m not 5 years old!
I am so excited to share that I have done another CAL with Furls Crochet! If you aren’t familiar with CAL’s, CAL is just a fancy abbreviated way of saying Crochet Along, in which a free pattern, rather than being posted in its entirety, has a section posted each week (for any number of weeks) and people can follow along with the pattern as it progresses. Cute right?
This time I created The Frontier Shawl, a simple and fun filet crochet project! I had never done filet crochet before this, but it is SO much fun and there is so much you can do with! I certainly can’t wait to do more projects with it!
I don’t know about you guys, but sometimes I get in this mode where all of my creative energy gets focused on making projects that utilize the material that I already have at home.
While I love taking trips to the craft store, sometimes you start to see your bank account slowly go down and you realize that you need to tone it back a little bit, after all you probably have some amount fo craft supplies back at home that need some love.
Now that I recently started sewing, I am building up a large amount of fabric scraps that I have been eager to find a use for. I have also been on a streak of trying to make practical home decor items. That coupled with my home office becoming more of a reality, I have been wanting to make a bulletin board for a while now, and it has finally happened!
Personally I made this with things that I already had around the house, but if you have to go out and get these materials, it really shouldn’t break the bank, especially when you use the everyday coupons at places like Michaels, JoAnn, and Hobby Lobby. It also easily can be finished in about 30 minutes! So let’s dive in shall we?
Materials
1 Fat Quarter of Fabric (18″ X 21″)
3 Yards of Pom Pom Ribbon
1′ X 1′ piece of cardboard
1′ X 1′ some kind of squishy material
Optional extra embellishments
Hot Glue Gun
Scissors
For the “squishy material”, i’m going to be 100% honest, I don’t know what the stuff I used is called, but I know I got it at Daiso. It is reflective on one side and a plastic spongey material on the other side. In general just try to find something with a little bit more squish to put between the fabric and the cardboard.
Construction
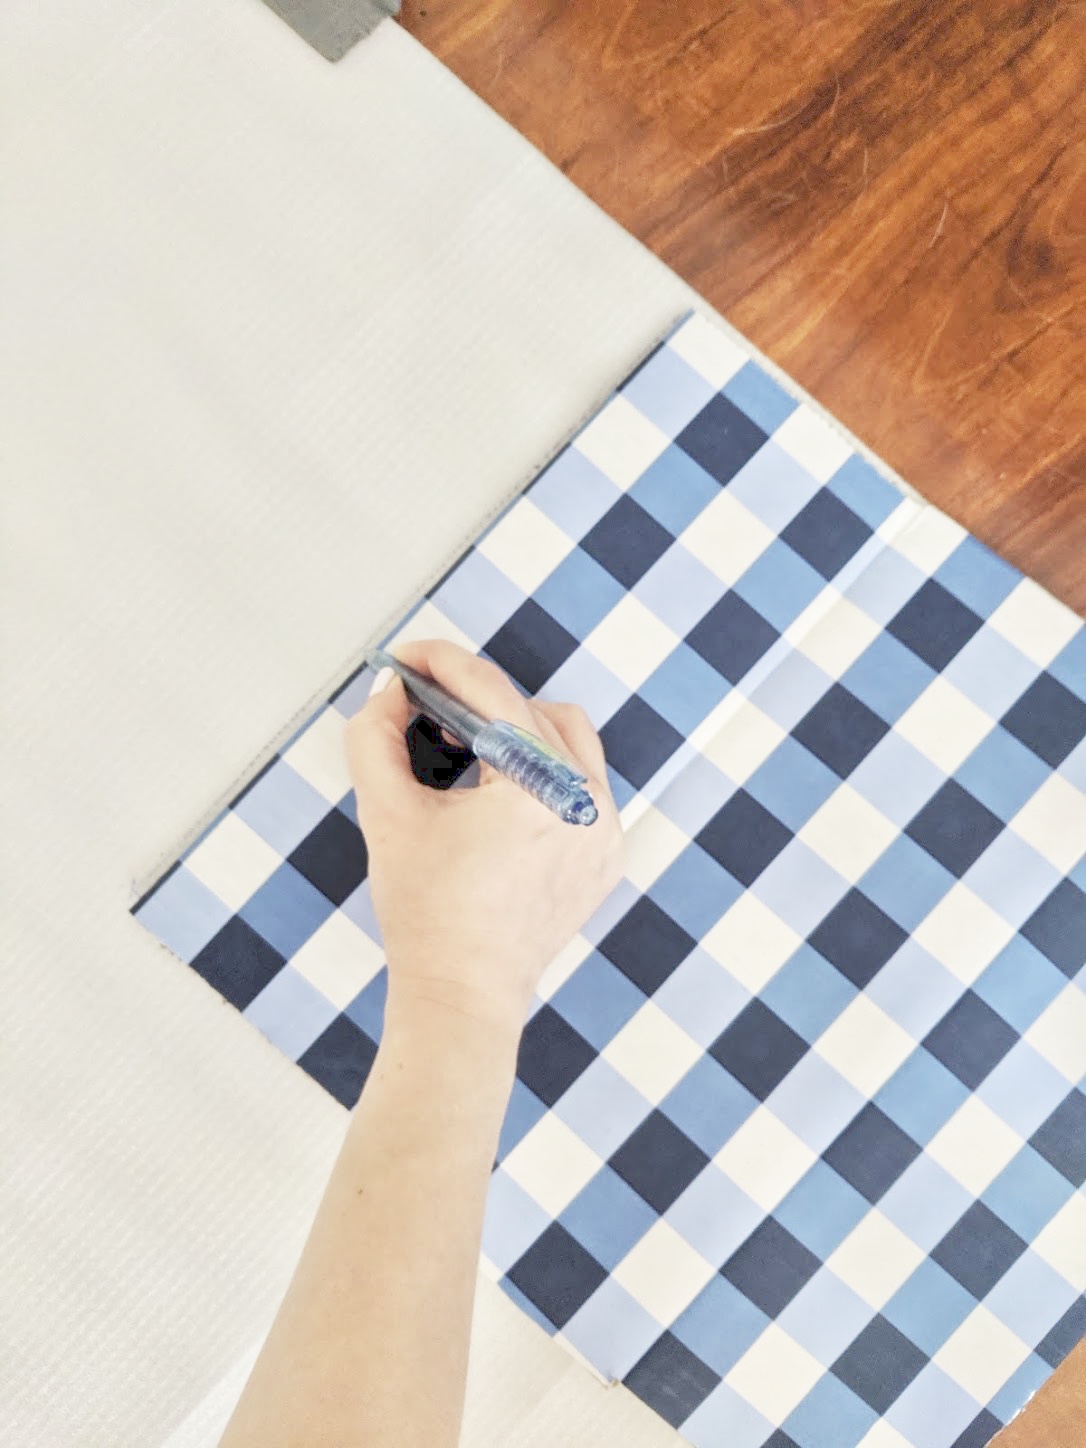
First you are going to cut out your piece of cardboard to 1′ X 1′. I had a box from Bath and Body Works which is why the cardboard is a cute gingham, it happened to be the perfect size!
Once you have your cardboard cute out, you can place it over whatever squishy material you are using and trace over it
Cut out your squishy material and hot glue it onto your cardboard piece. Since hot glue dries so fast, I glued an x onto the middle of cardboard piece and lined it up quickly with the squish material to keep it more structured. I then peeled up the edge pieces of the material and glued it down all along the edges.
Cut off any excess that you may have. It you traced and cut perfectly, but if you are kinda lazy like me, you will probably have a little bit of excess.
Place the 1′ X 1′ piece over your fat quarter of fabric. The fat quarter should be a quite a bit larger than the cardboard piece. If you wish to trim off most of the excess to use for something else, do that by all means! Just make sure you have at least 1″ of excess fabric around each side.
In the picture I had the squish side facing toward me, but don’t do that! haha. Make sure you have the squish side of the square against the fabric and have the cardboard facing you.
Simply fold the fabric over the edge of the square and hot glue it down. Similar to the way you glued earlier, since the hot glue dries really fast probably do little sections at a time to make sure all of the sections get glued down securely. The hot glue, as you can assume, is very hot so have something other than you hand to press the fabric down onto the glue so that you don’t burn yourself.
Once you have it all glued down, the back won’t be beautiful, but you won’t see it, so no harm done right? Flip the piece over and start gluing on your pom pom trim in small sections with small dots of hot glue. This is literally the part that took the most time and even then it was only 10-15 minutes.
Once you get all of your pom pom trim glued on, you should have some ribbon left over, which you have use as your hanging string by gluing it onto the upper back of the board.
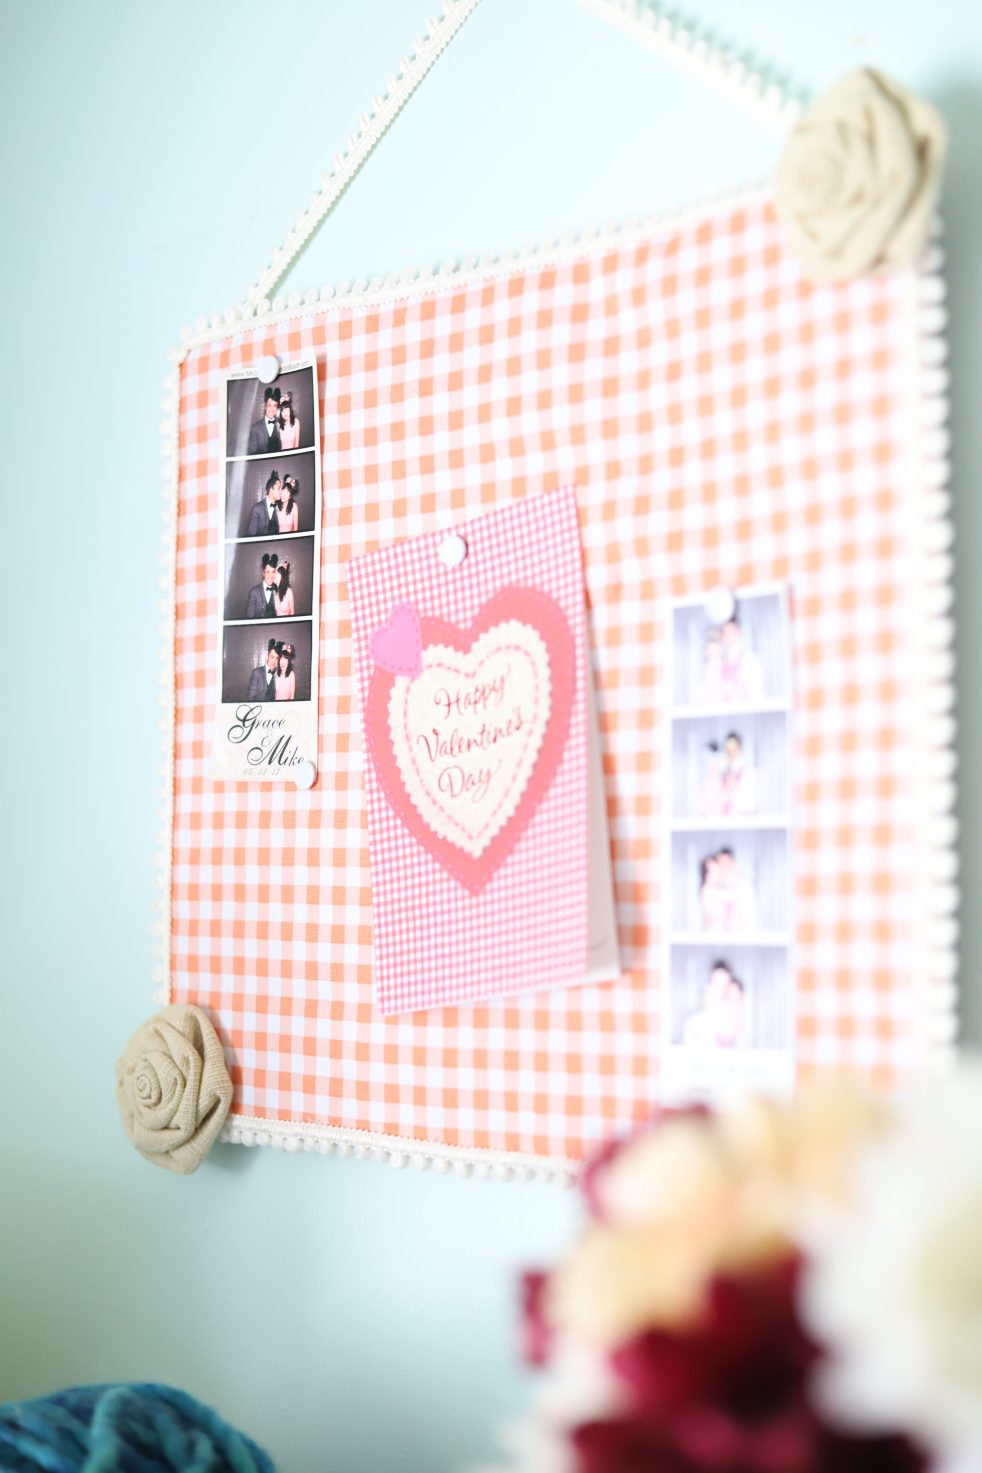
Additionally you can add any other little embellishments that you wish to add to the corners. I had these fabric flowers that I needed to use for something and this felt like the time to do it! Once you make any additions you’d like you are done!
I hope you enjoyed this tutorial! As always if you have any questions or want to share your finished product, feel free to do so in the comments or on instagram!
Since I recently started sewing, I thought the best way to share my projects (with a purpose) is to do some sewing pattern reviews whenever I make a new piece! Do people do sewing pattern reviews? I swear I have seen them before, but of course now that I am specifically looking for some to reference, I cannot find a single one. I’m sure it’s a thing though.
While this isn’t the first pattern that I am following, I think it is likely going to be the first review that I post because I am so incredibly behind on taking photos of the finished garments (woops), but let’s go on and dive into this pattern review shall we?
Choosing the Pattern and Fabric
So when I began looking for a new pattern to follow, I knew that I wanted to focus on making tops for a while. The first pattern I ever followed was for a dress that wasn’t quick beginner friendly, so since then I decided that I should step back for a few projects and learn a little bit more before I tackle dresses again.
I am super guilty of being attracted to clothes that may be cute, but aren’t super practical or comfortable, so with that in mind I wanted to try to find patterns that I knew would be flattering, but also easy to wear.
I’ve only realized in the past couple years that I am truly a girly girl at heart, so if something has a bow on it, i’m immediately drawn to it. With that in mind, is it any wonder this is the pattern that I chose?
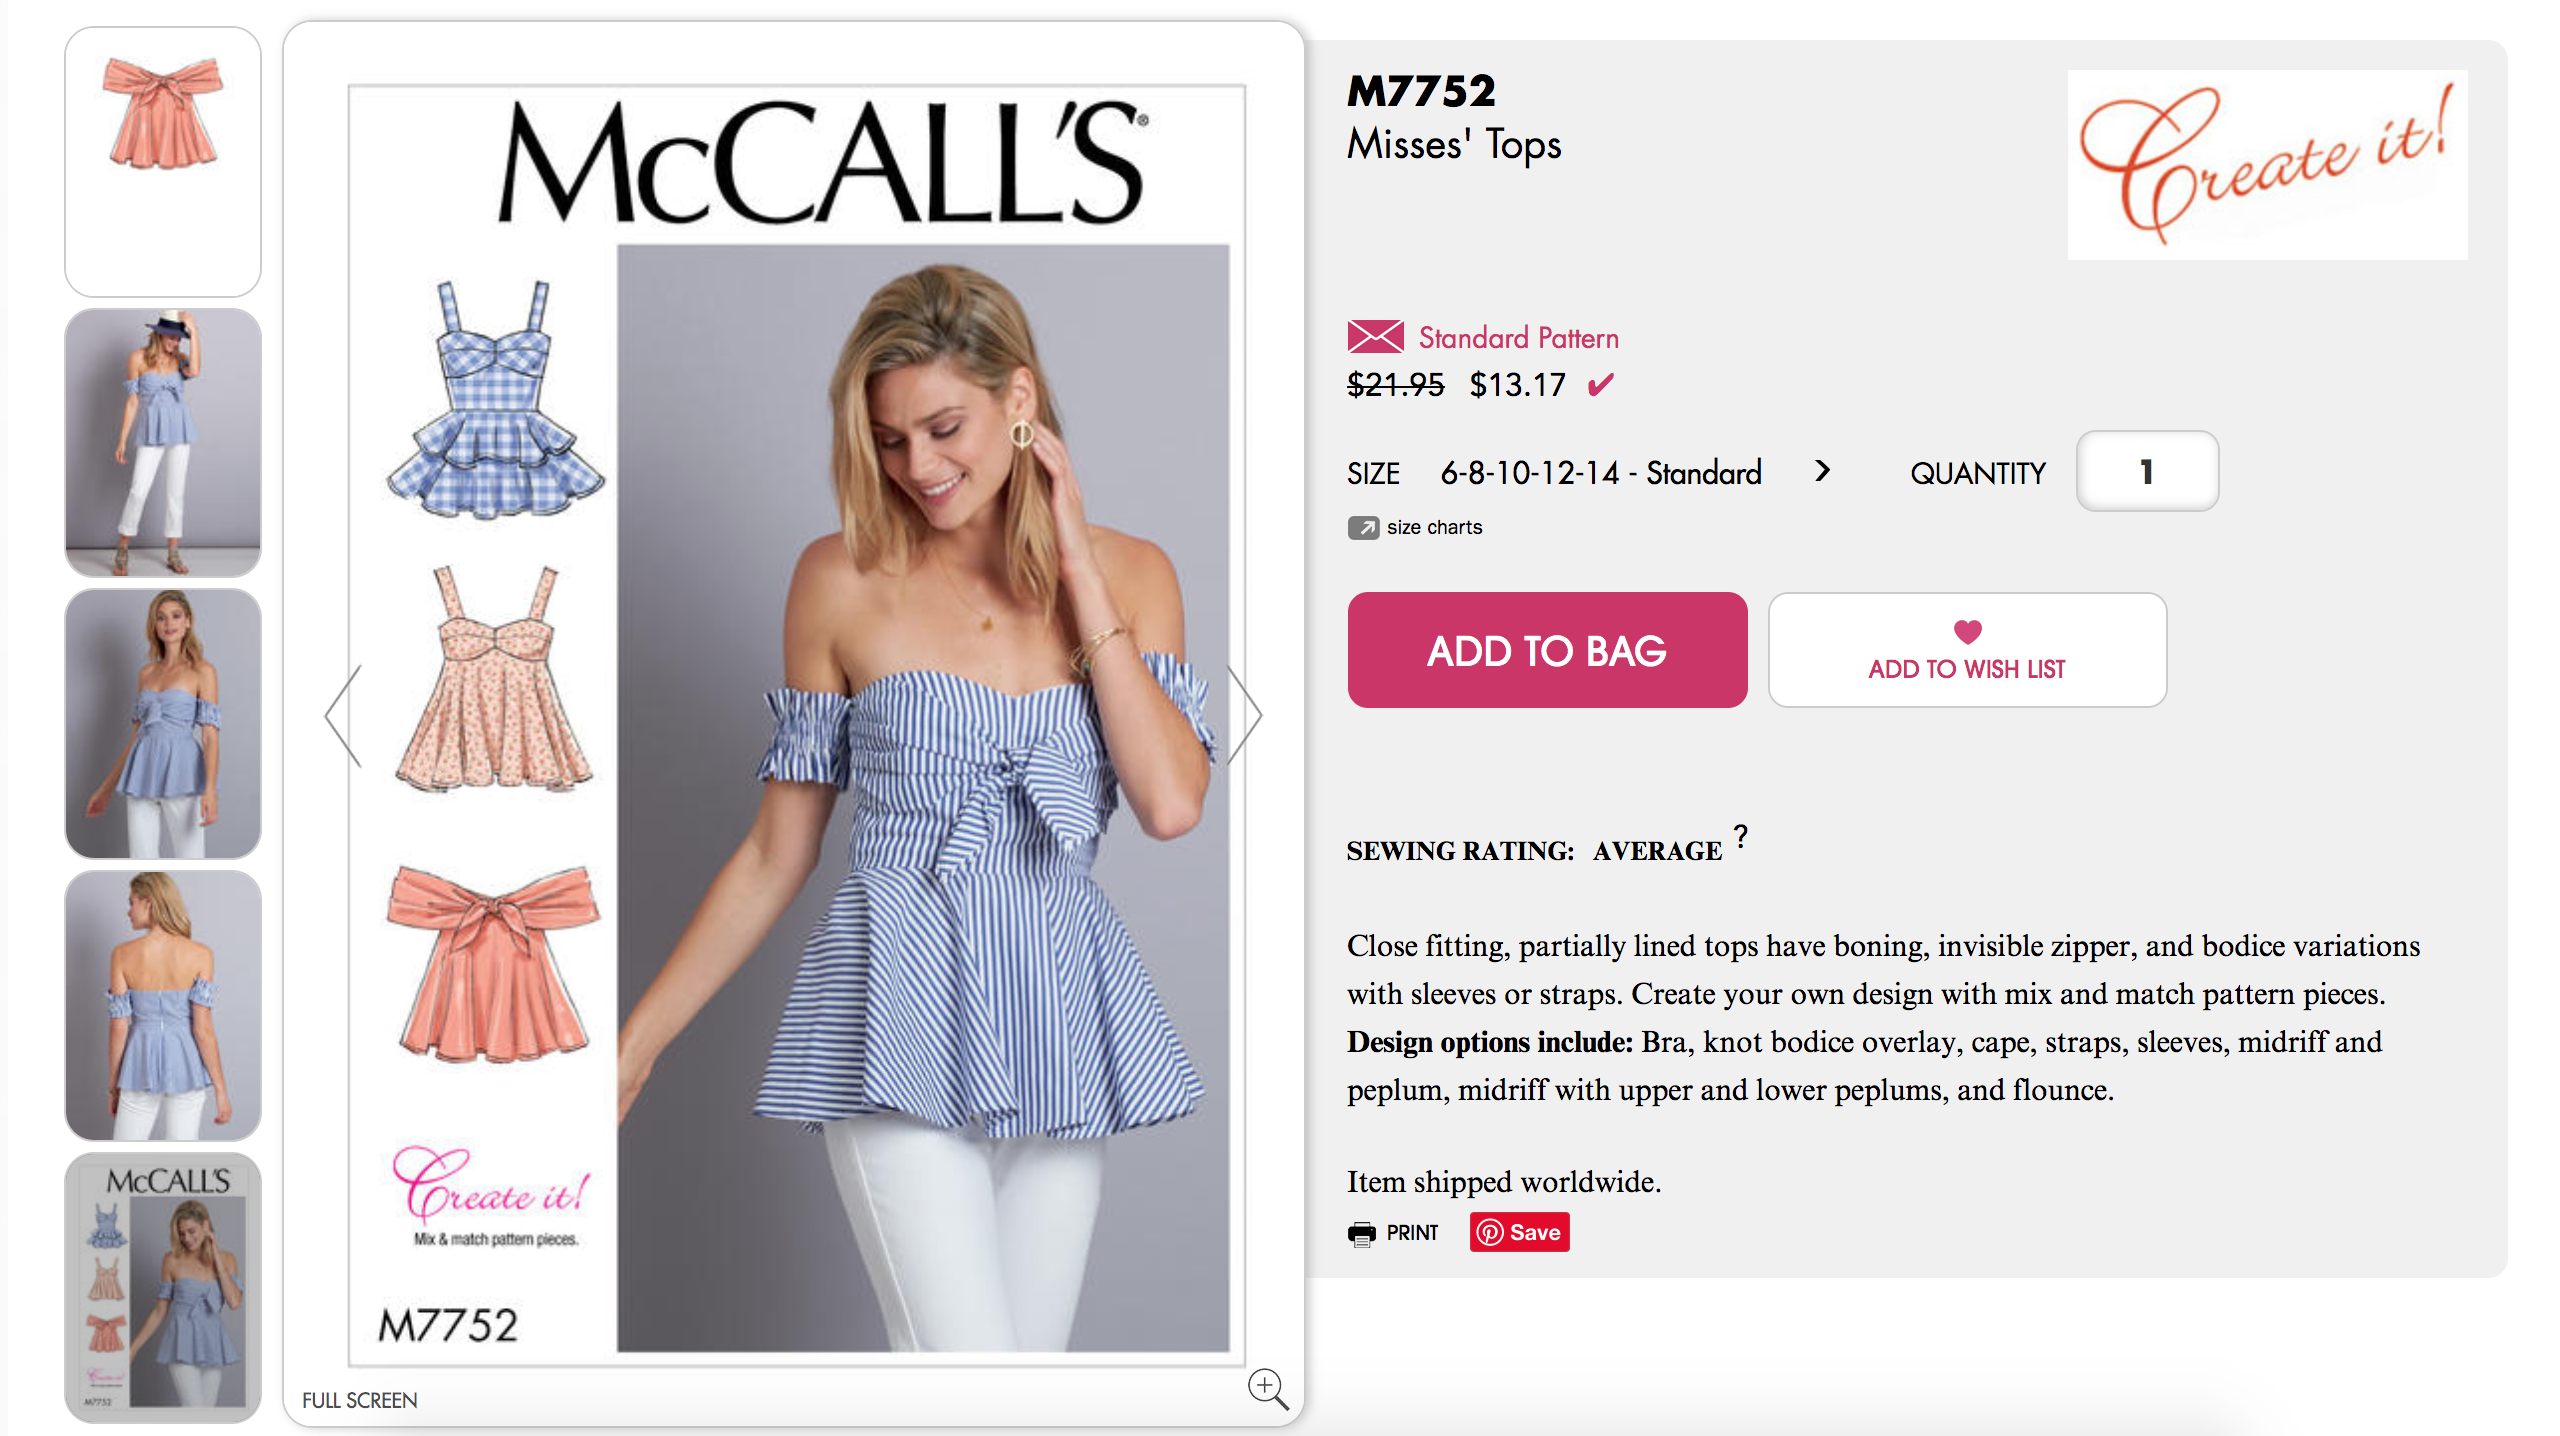
I decided to go with the McCall’s M7752 Misses’ Top Pattern.
I have been loving browsing the fabric aisles and there are so many cute fabrics I grab for smaller projects, but when it comes to choosing fabrics for garments, I have been rather picky.
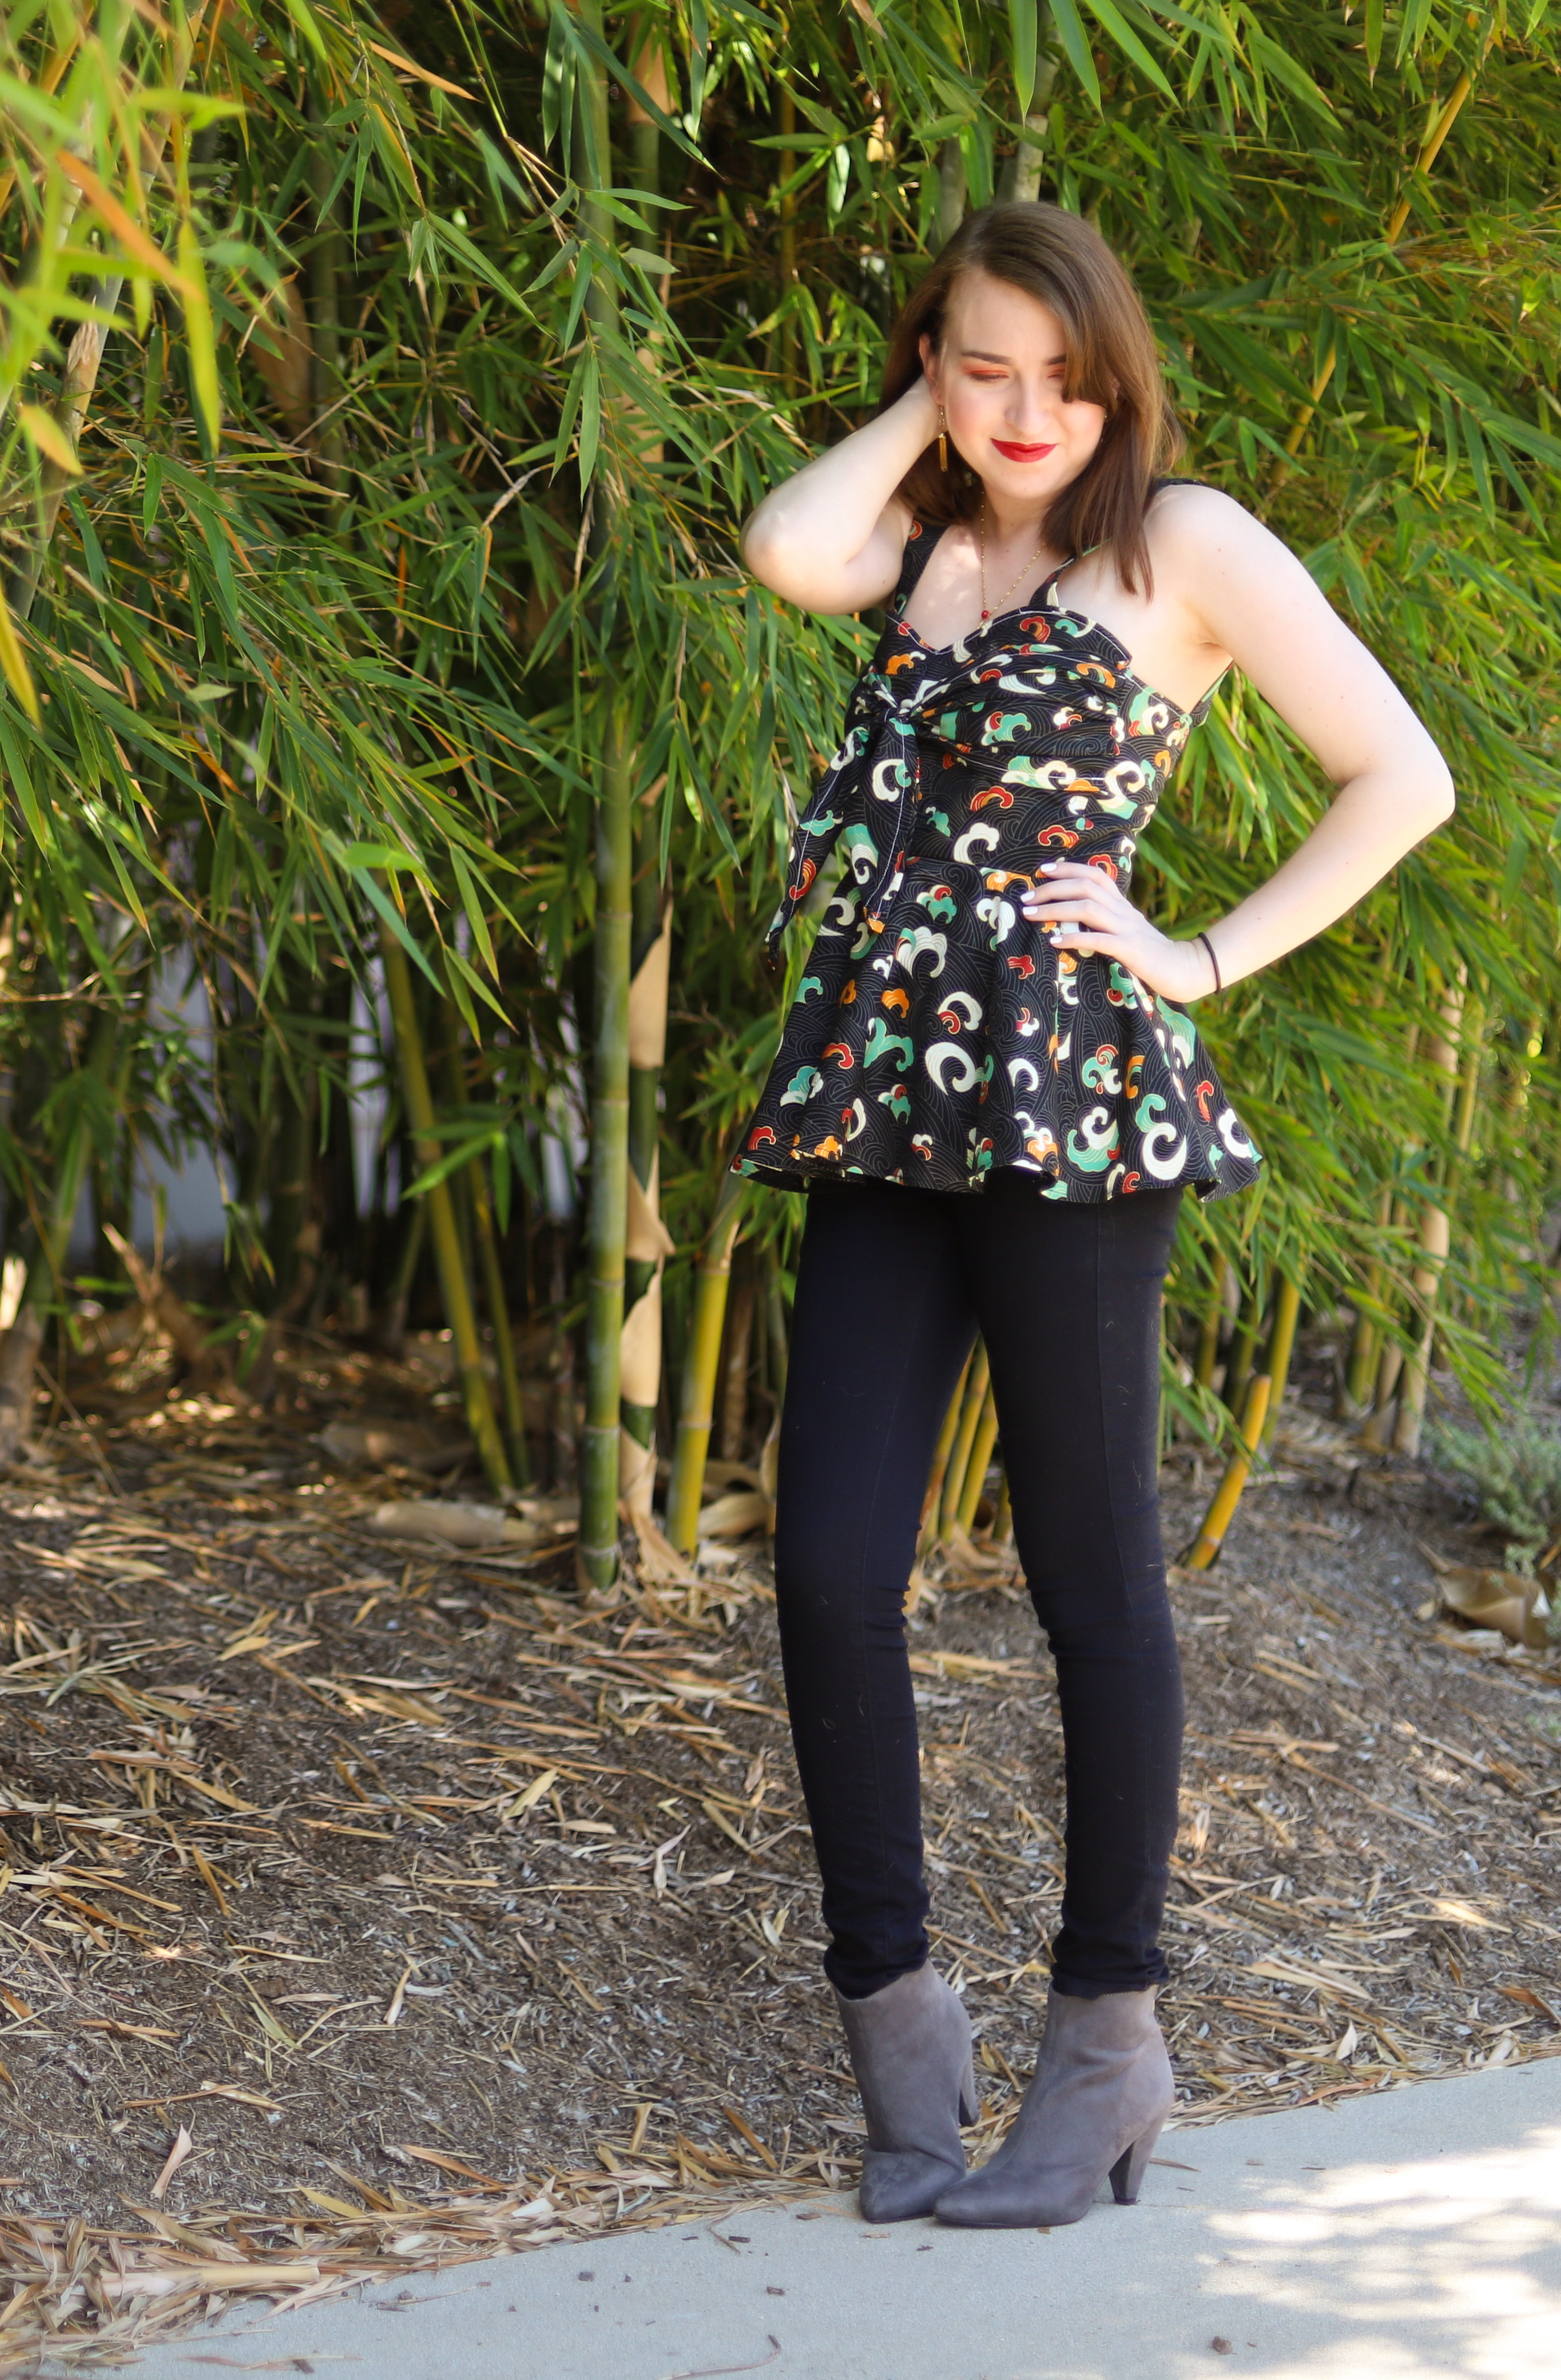
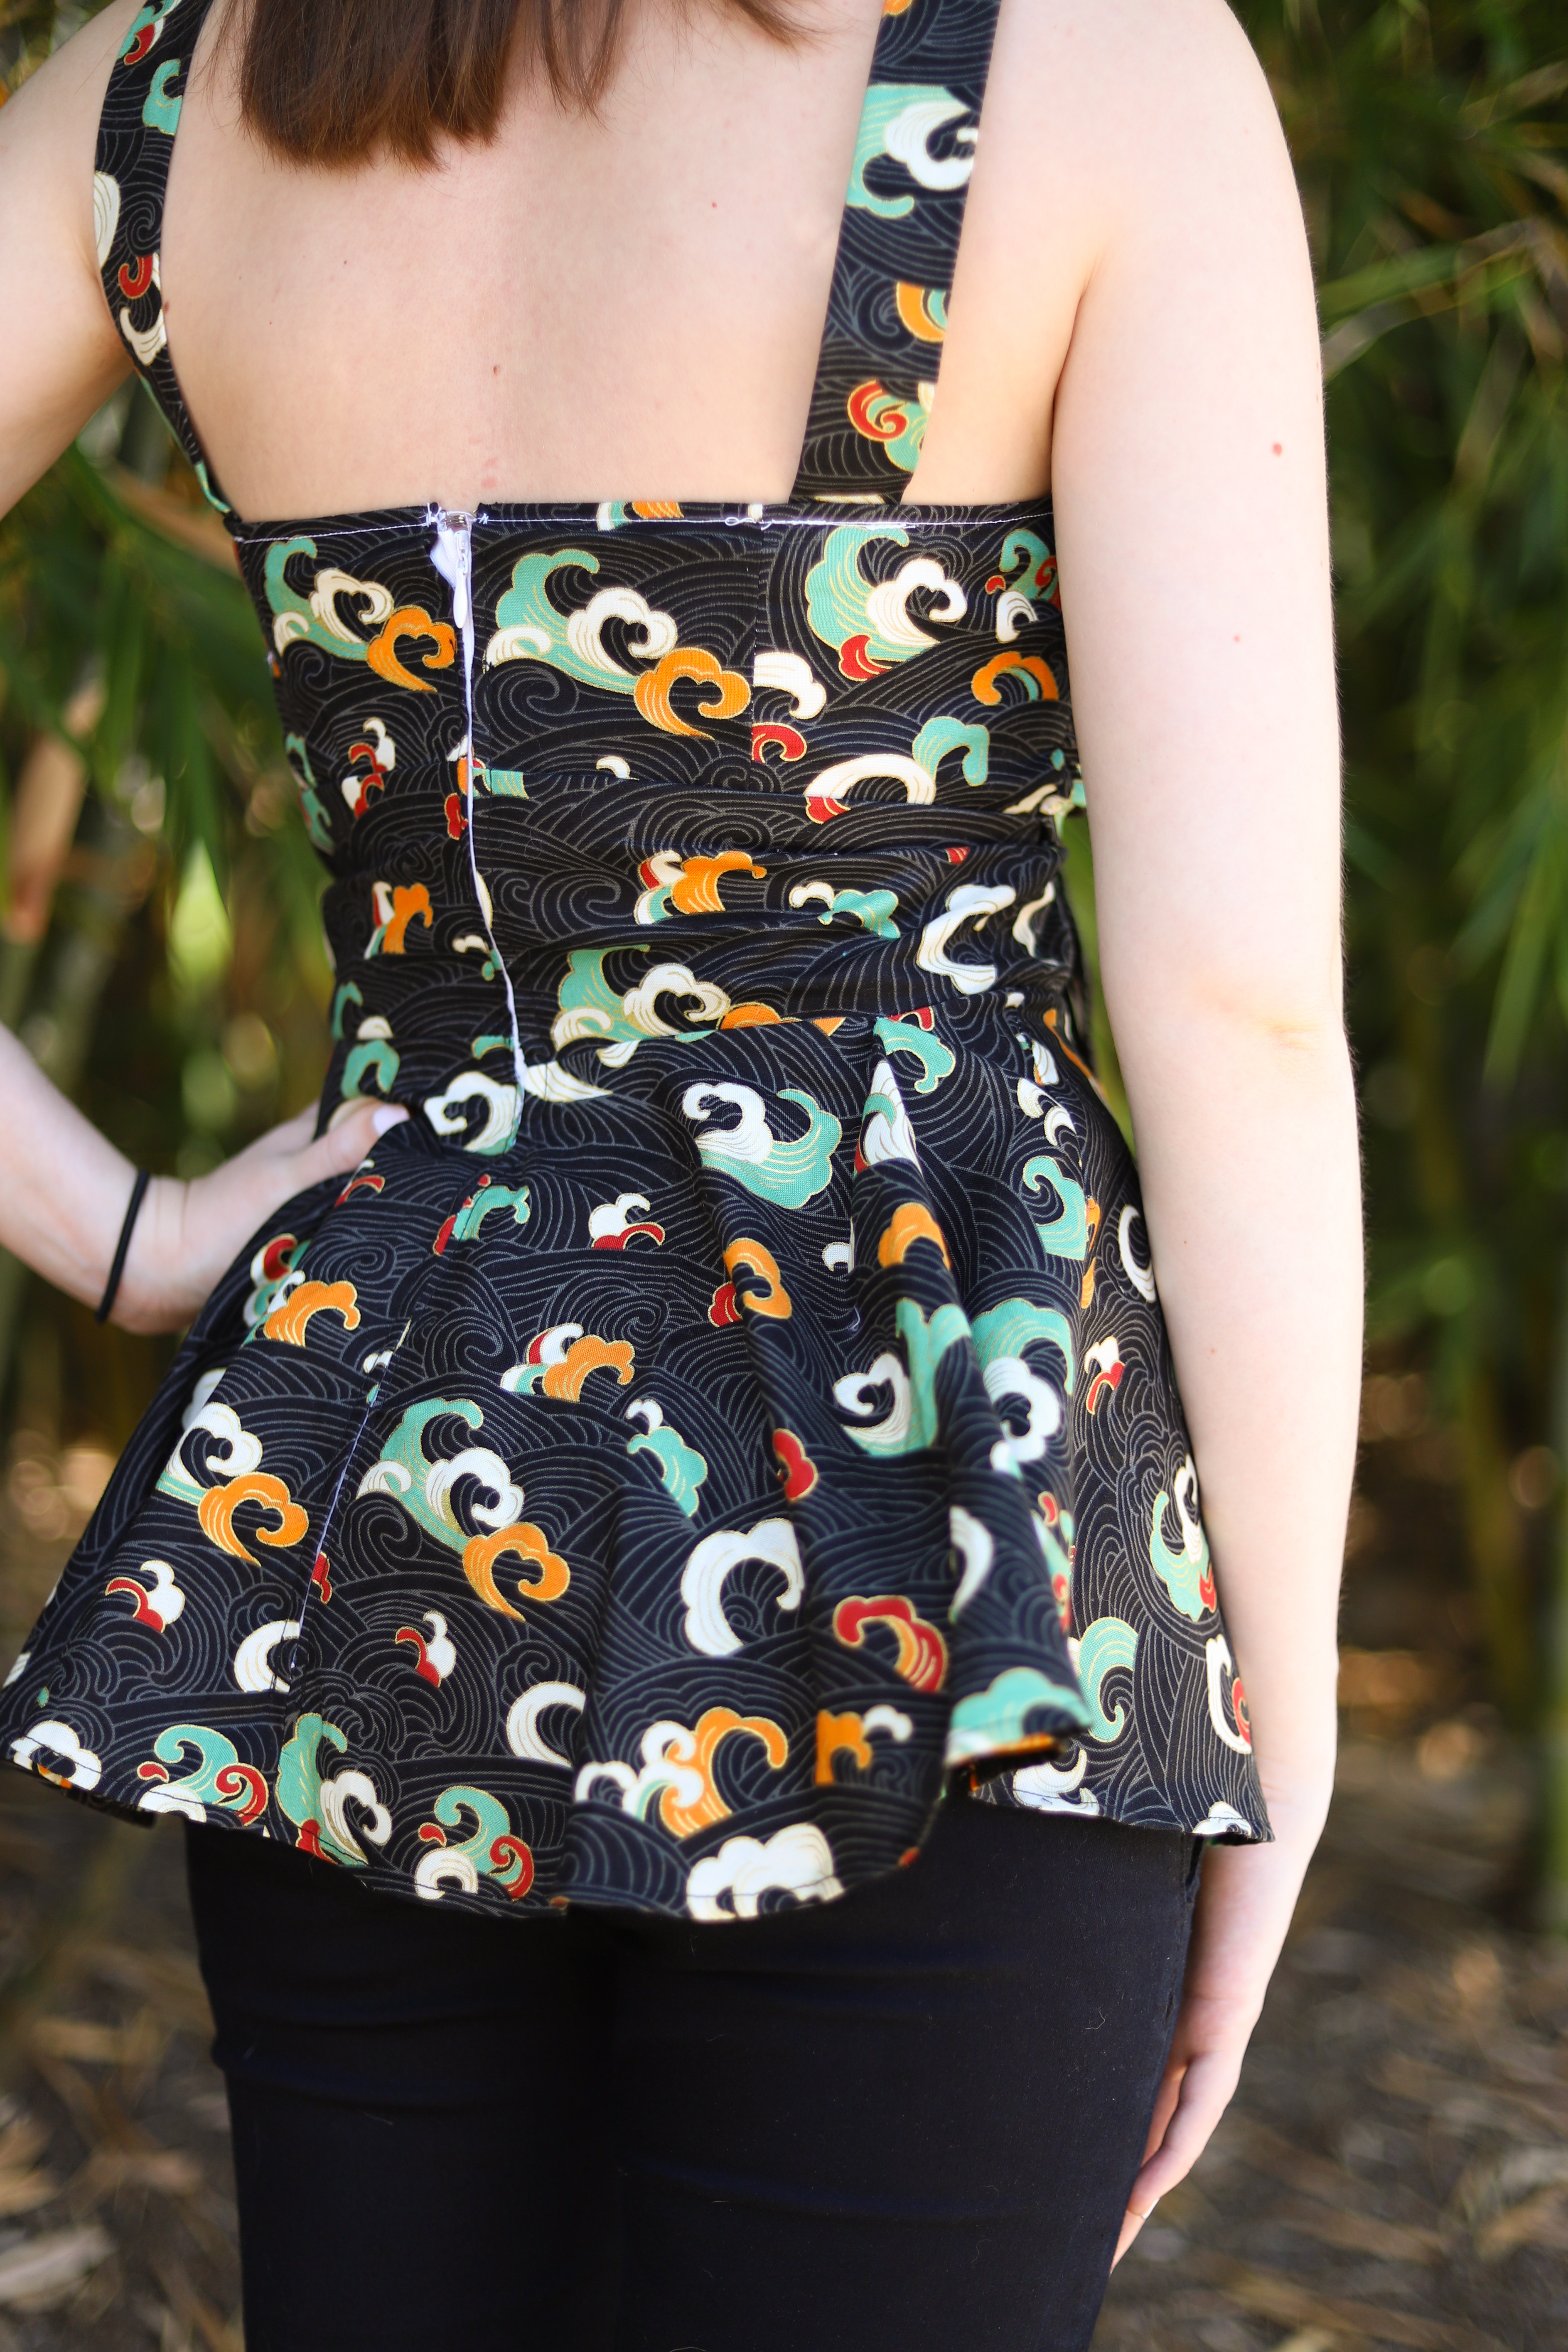
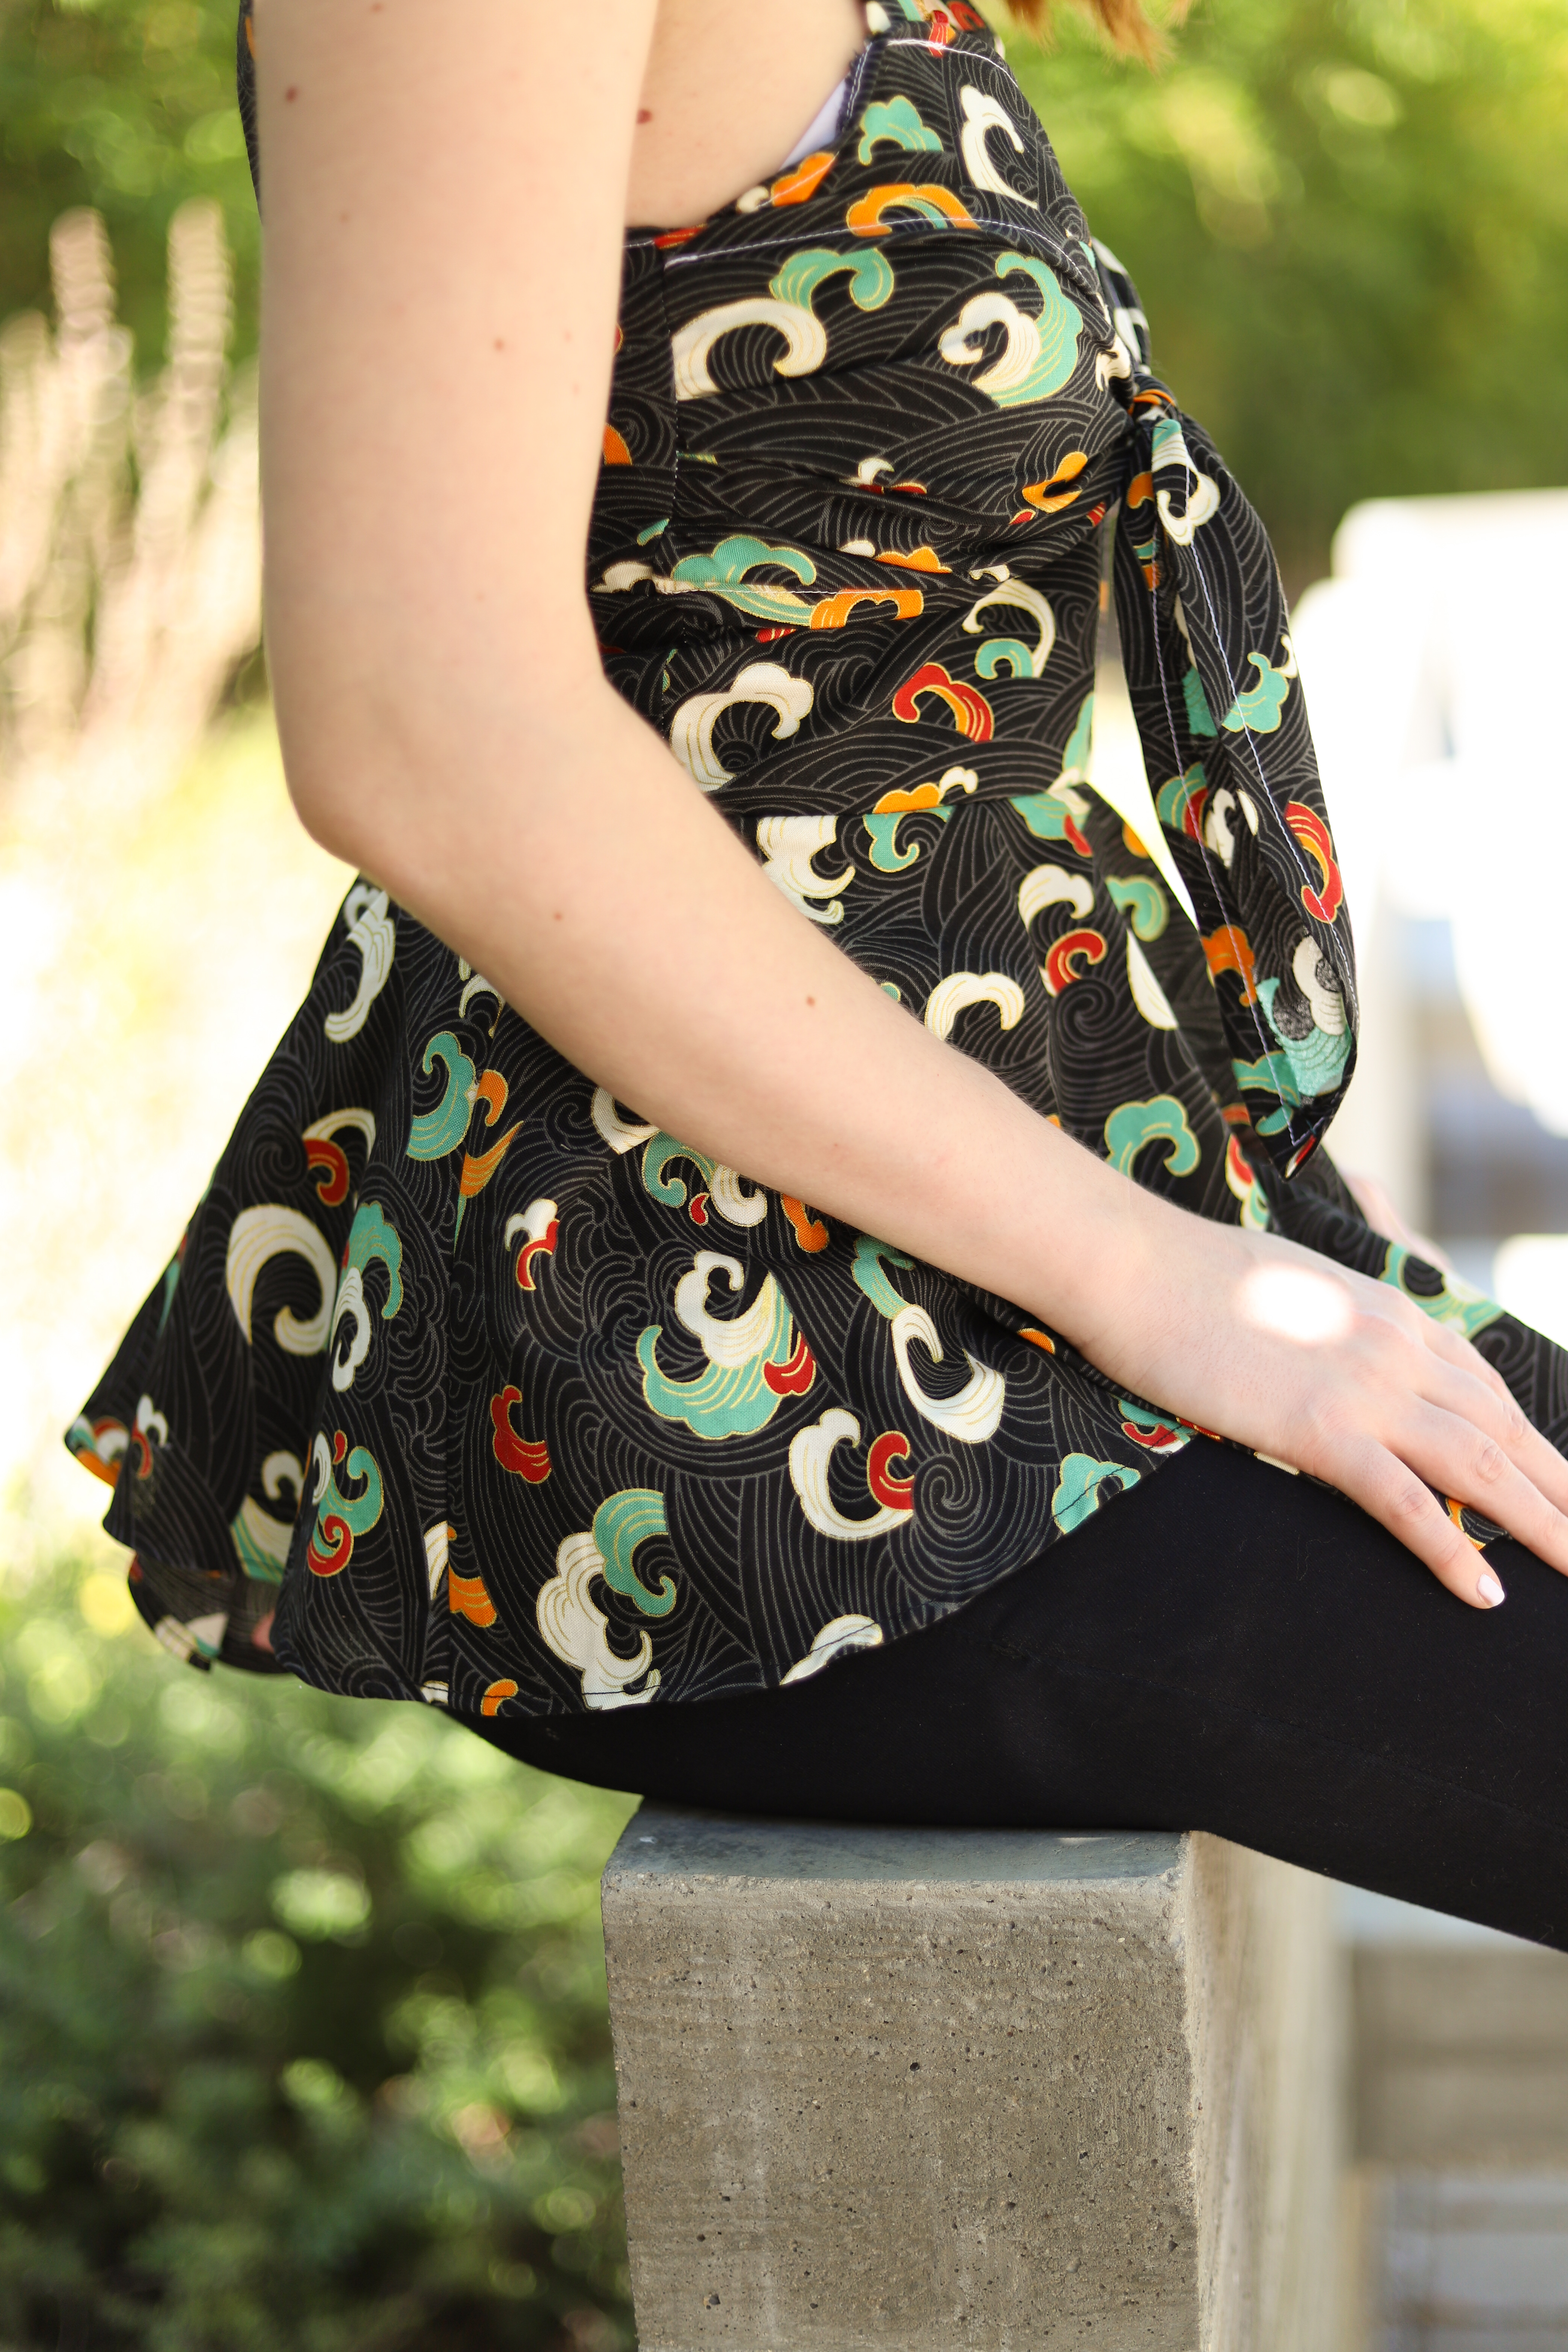
Recently I have noticed that I tend to play it safe with the colors and patterns I choose for my clothing, not that there is anything wrong with that, but I have been wanting to step out of my comfort zone lately. I saw this bold colorful wave pattern and knew it would be great for this blouse. I know this fabric pattern is a little funky and not for everyone, but I really enjoy it!
Initial Thoughts
I had purchased a couple different patterns when I picked this one up and actually didn’t intend to make this one first because I thought it seemed a little more difficult than some of the other options. However, once I opened up the first pattern I realized that I accidentally purchased the wrong size. I wasn’t about to let a night of productivity go to waste, so I decided to do this pattern first after all.
Upon reviewing the instructions, I realized that this pattern is a McCall’s “Create It” pattern, in which you are supposed to mix and match different parts on the pattern to make your ideal top! I hadn’t seen a pattern like that yet (and clearly didn’t realize that when I purchased it). While I thought this was a really cool idea, I also started to think that it might make the process a little more complicated to understand, thankfully it didn’t!
Construction
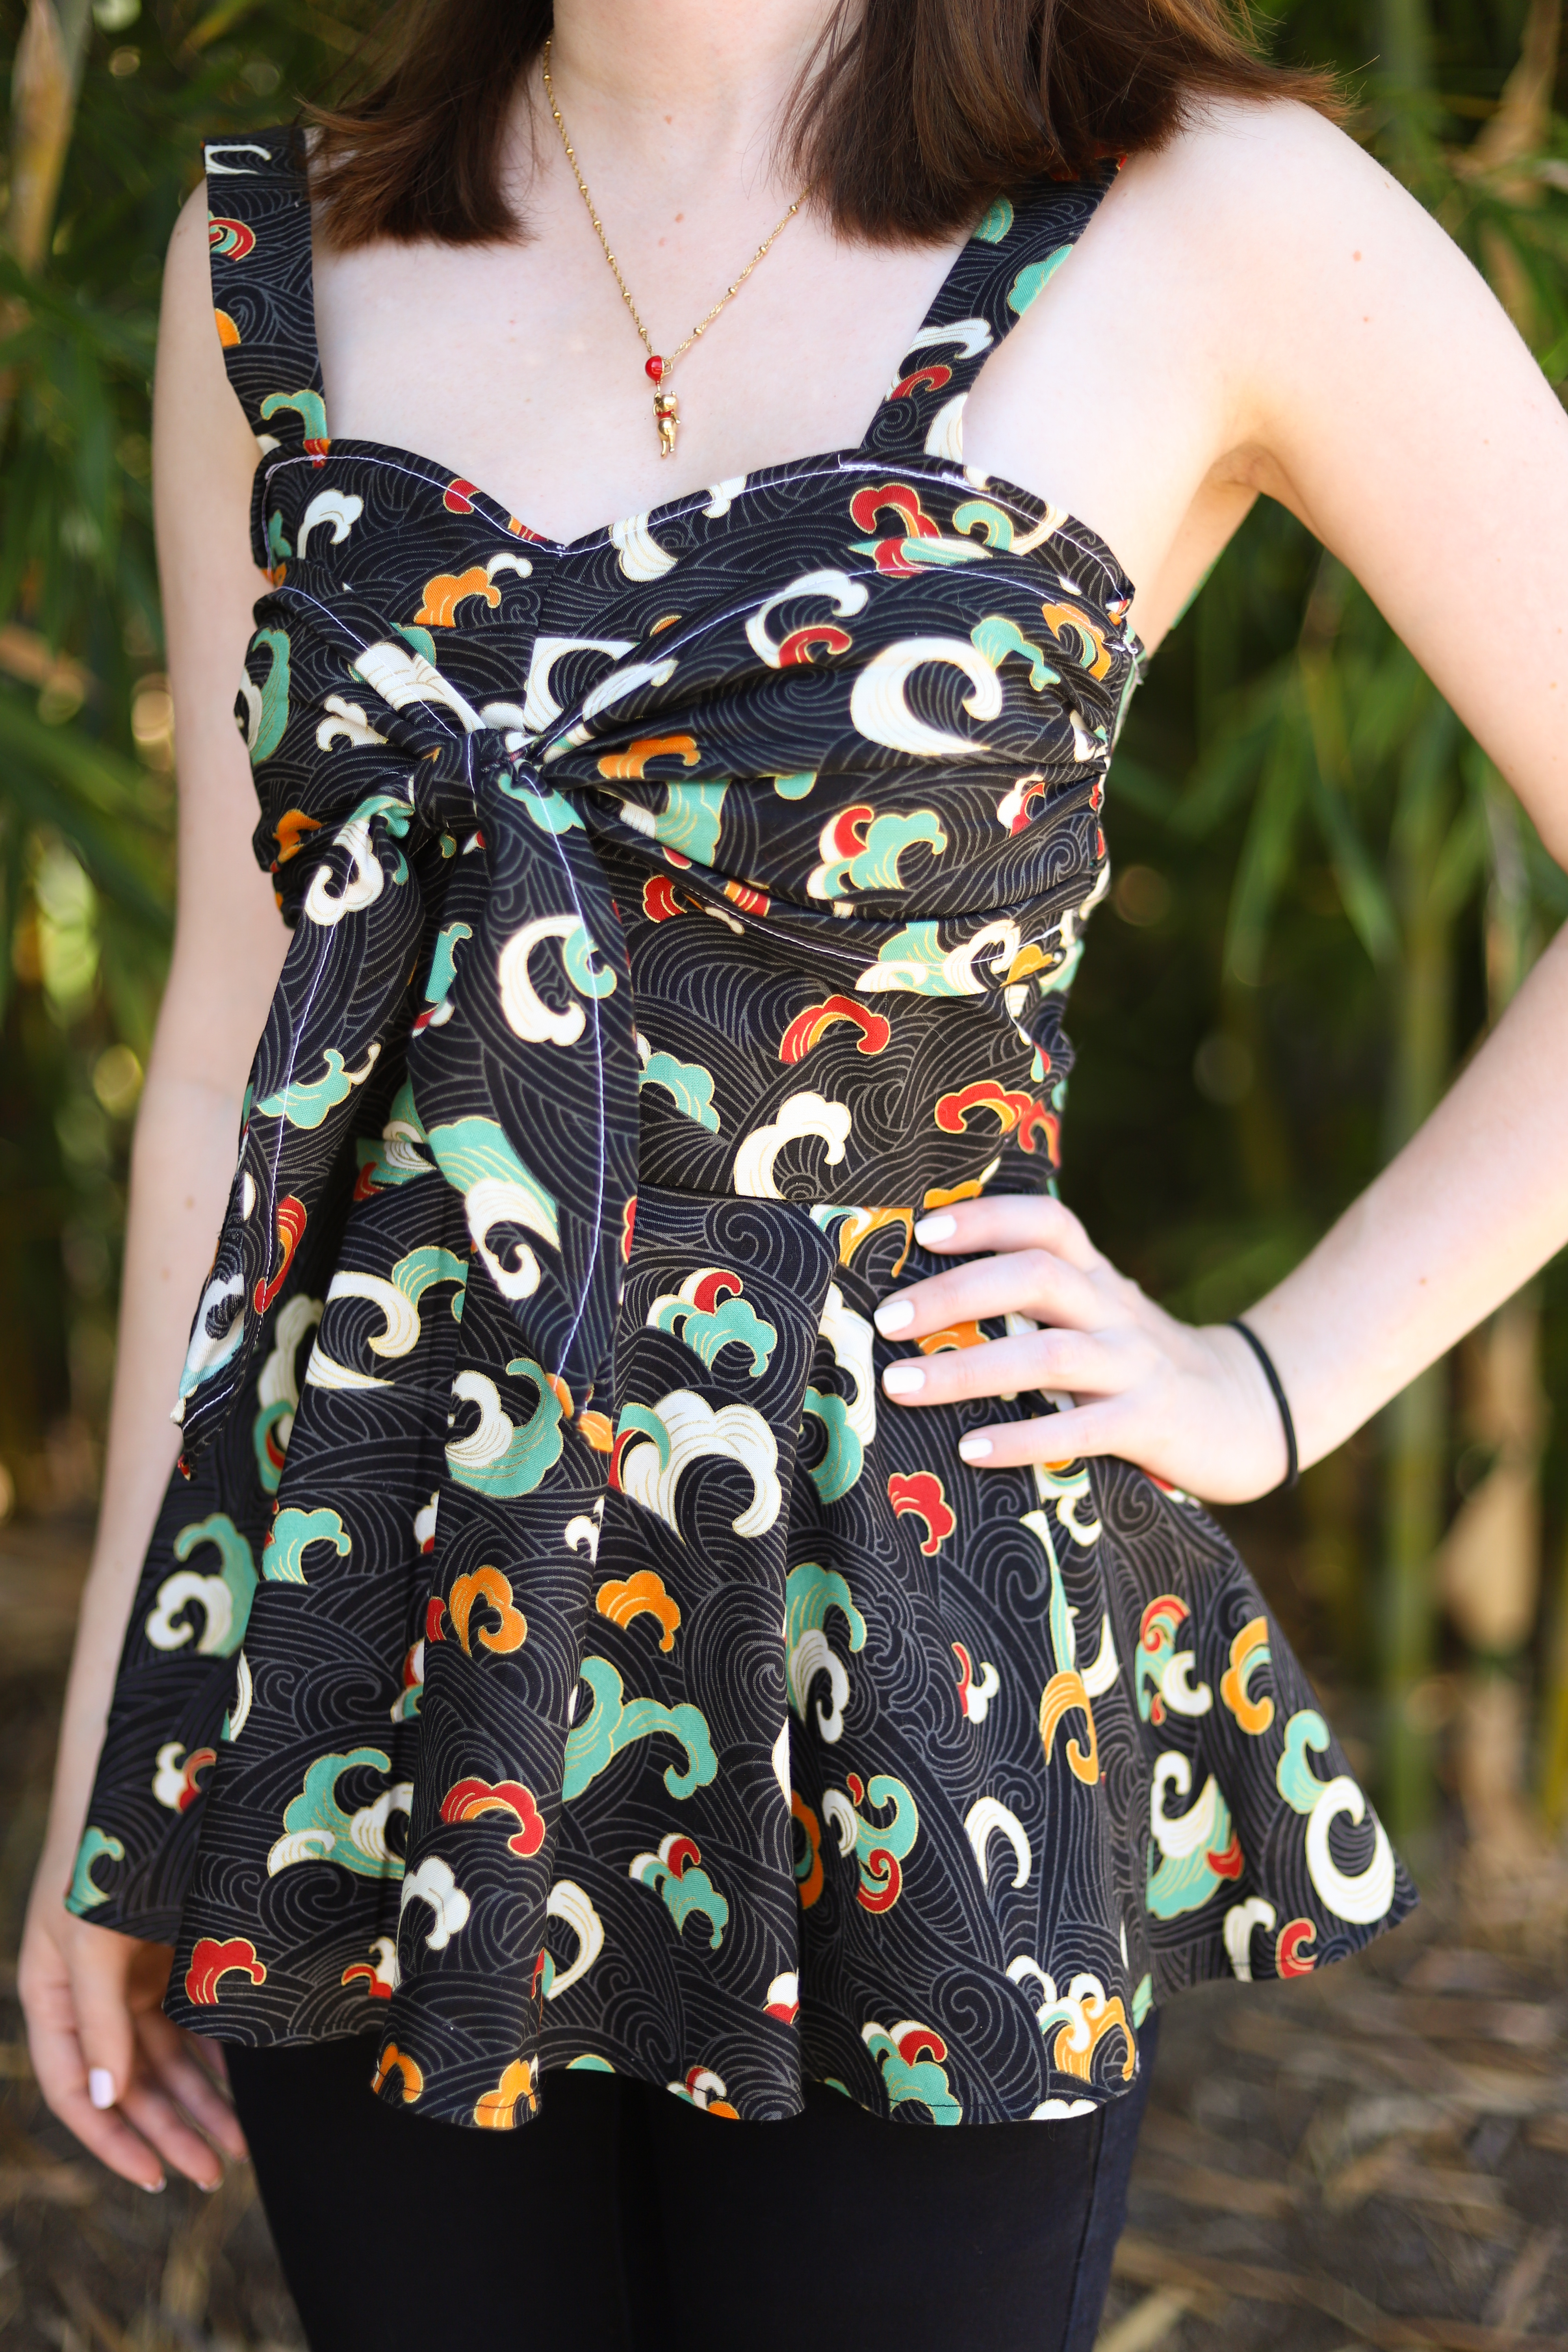
There were quite a few mix and match options for this pattern, but I decided to go for the bow front (2), single peplum (6) and straps (4)
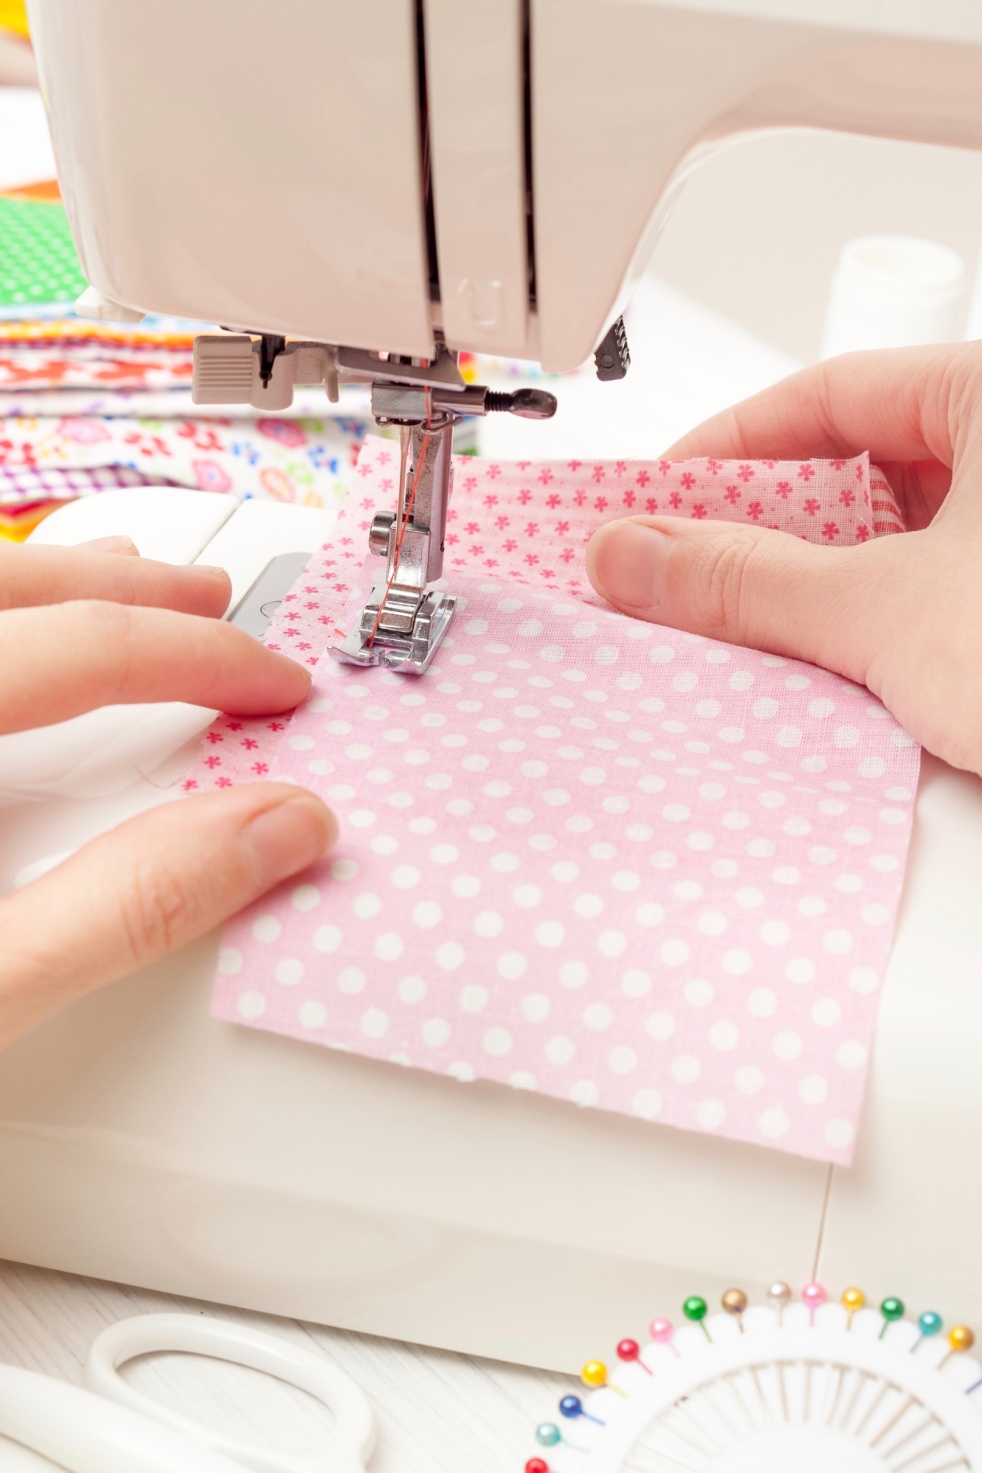
Overall, the instructions are very easy to follow, there really aren’t any curveballs. This was my first time following a McCall’s pattern and the construction process is definitely more refined than the cheaper patterns out there.
Not that it is revolutionary, but this pattern calls for lining and boning, which were two things I never worked with (1 of which I still haven’t worked with). I did partake in trying out lining for the first time, but I decided to forgo the boning. It didn’t specify, but after a few try on’s I feel like it would only have been necessary if you decided to make a strapless top. I’m sure it would help give the top more structure, but I still decided i didn’t need it.
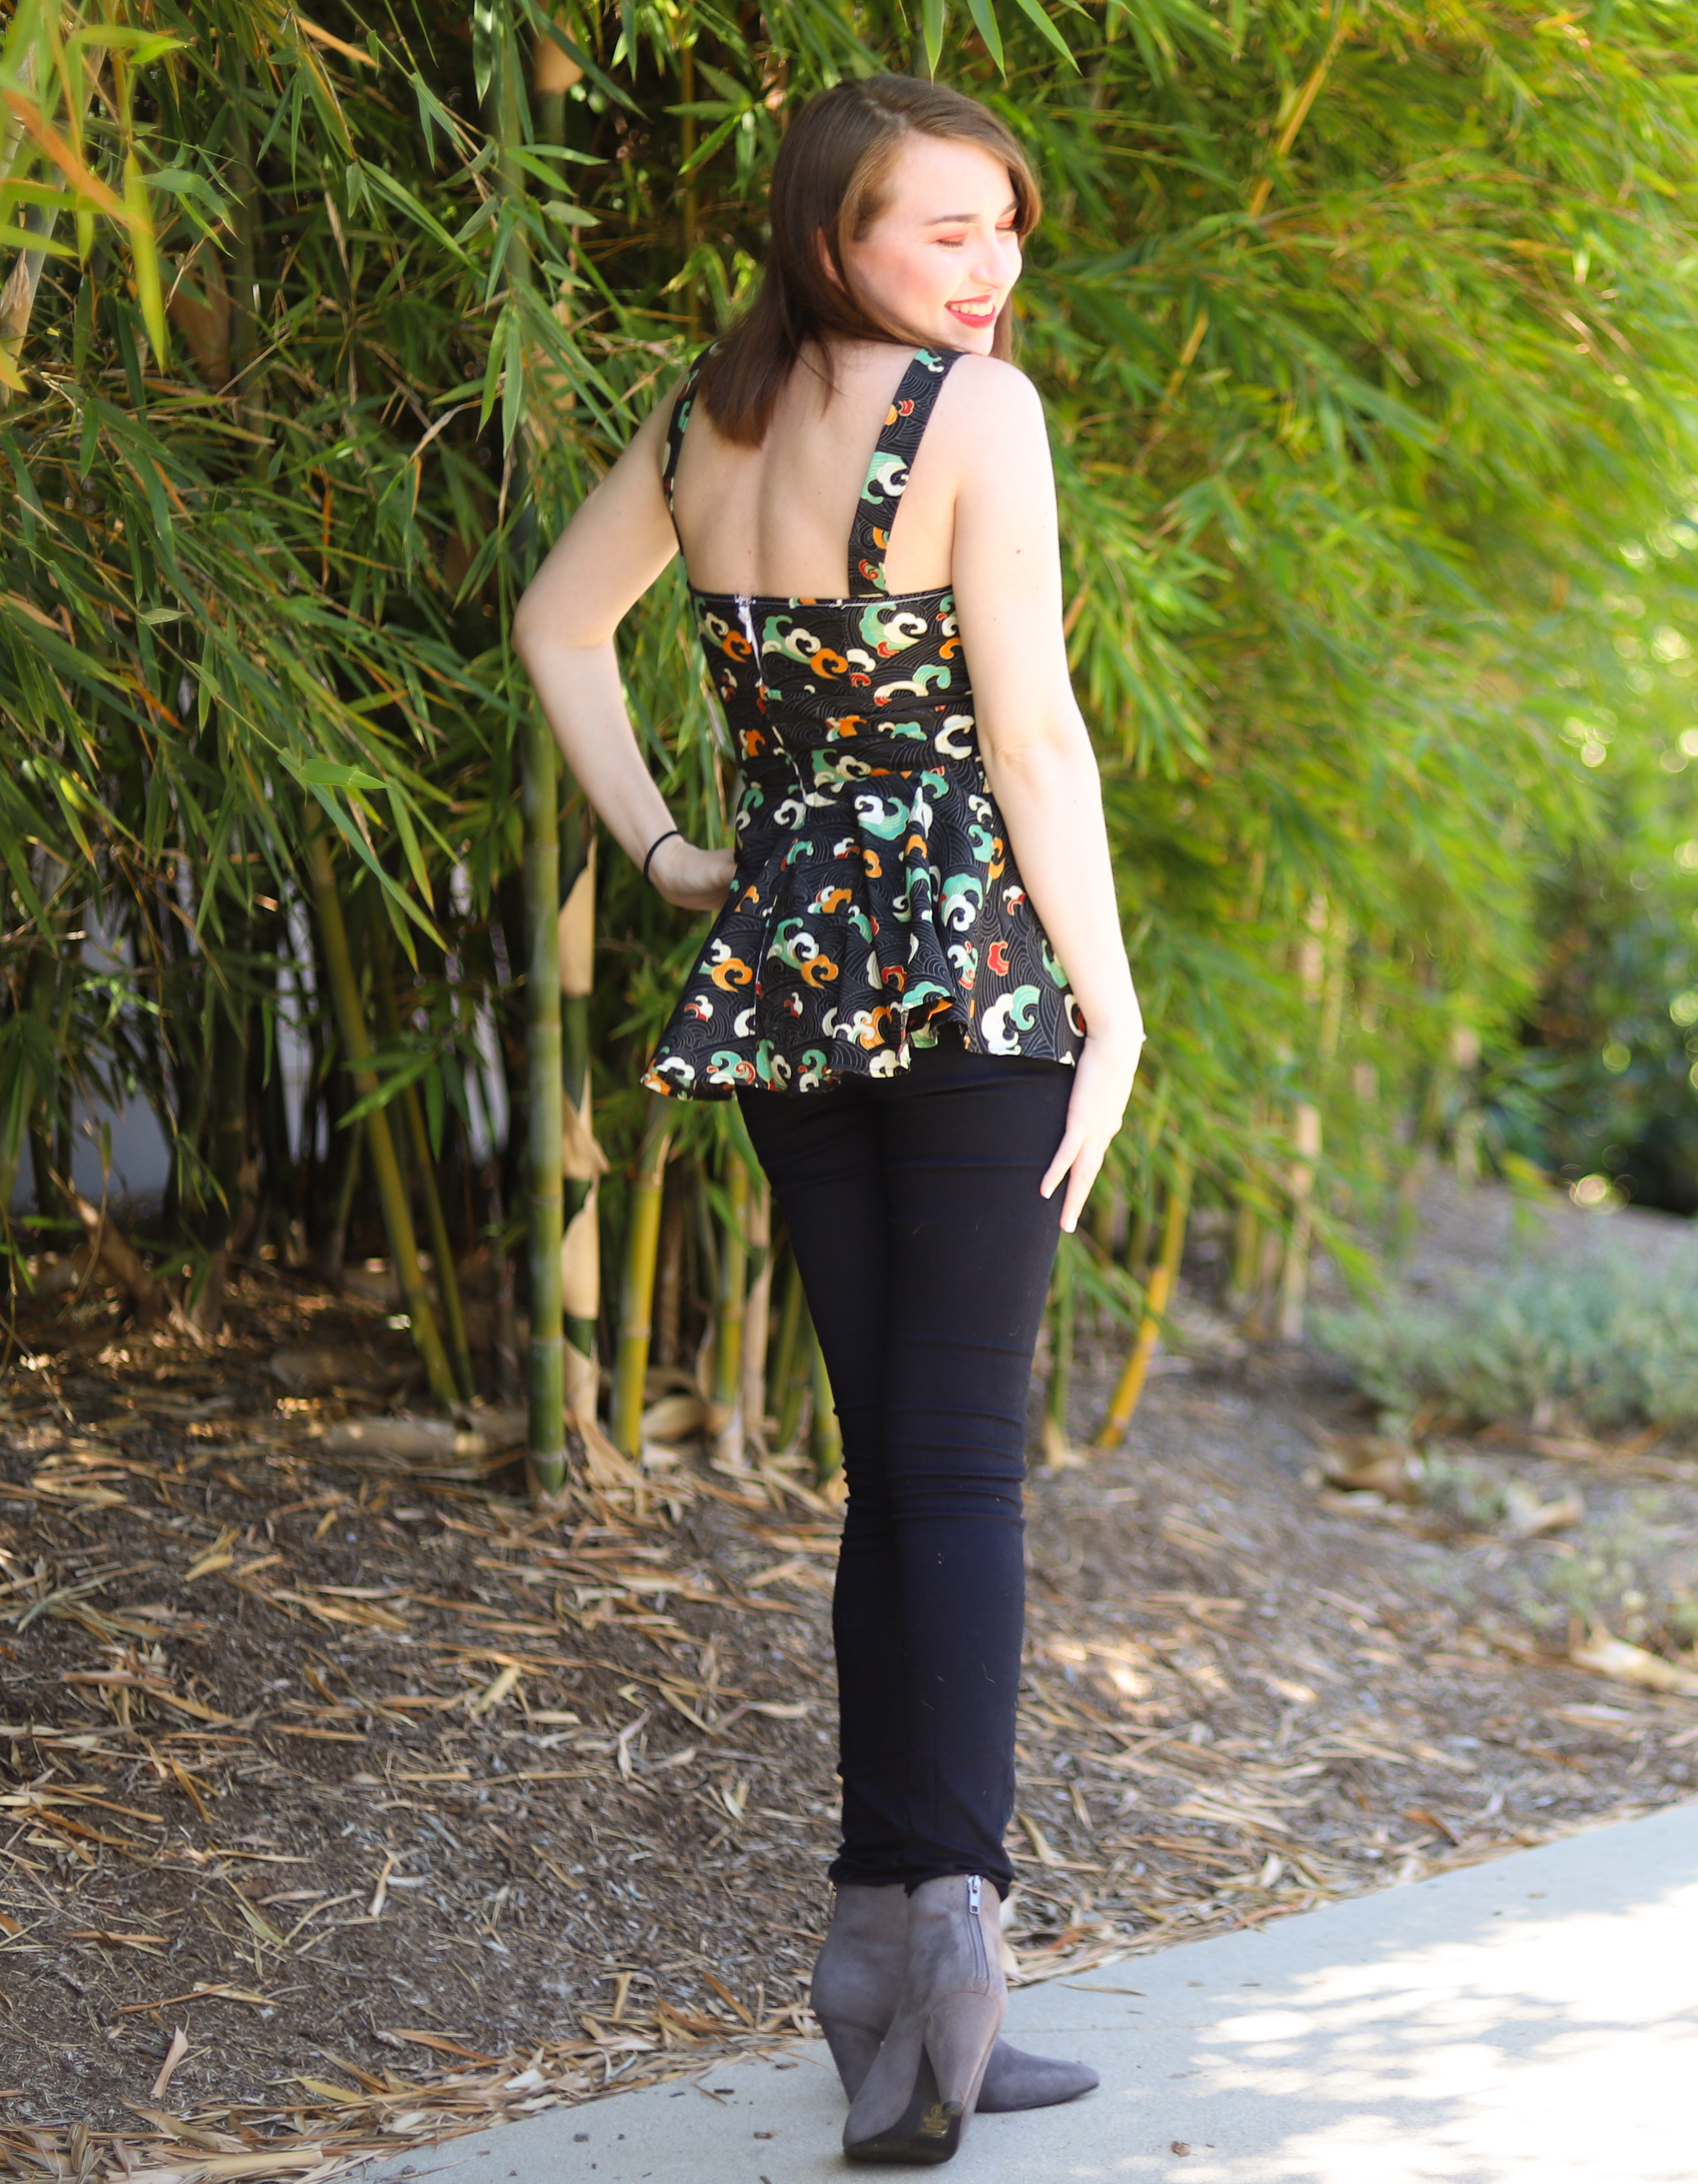
This pattern also called for an invisible zipper, which I was pretty terrified of, I have purposefully been avoiding projects with zippers, but much to my amazement I actually found a really easy way to install them, as long as it’s a back zipper. Ultimately you baste the opening where the zipper will be closed, press the hem open and sew the zipper onto the pressed hem and when you are done you seam rip the original basted section and voila!
Hiccups
While the pattern itself was easy to follow, I did have a couple little hiccups during the construction process.
Pattern Pieces – This could just be because I am a beginner, but there were 2 or 3 pattern pieces in which the cut lines were rather confusing to know where to follow. From a beginner’s eye, it wasn’t immediately intuitive, so in the end I just kind of winged it, but I think I got it right??
Interfacing – Literally the first step is to iron interfacing onto all of the bra pieces and I went ahead and completely forgot to do it. I’m sure it would have been useful to have, but I still think my top looked good and felt stable and comfortable without it
Bow Hem – The second step is to sew a narrow hem onto the front bow overlay. I thought that this part seemed weird because the drape of bows is unpredictable, so you would likely have times where the wrong side of the fabric would be showing when you wear the top. I thought maybe there was an extra step later to address that, but there wasn’t. So if you have a problem with the wrong side of the fabric and the hem being visible, I would get a little extra fabric and have the bow be double sided, it may add a little bit of bulk, but i’m sure it would be fine.
Fabric Pattern – Again this is probably because I am a beginner, but if you have a single direction pattern, be sure to really pay attention to how you attach the pieces. I attached the opposite pieces quite a few times which cause some of the waves to be upside down and had to do a lot of seam ripping and restitching to fix it. Don’t be like me haha.
Straps – When I tried to measure how long i needed my straps to be, I tried them on with my posture being” proper”, however, in most cases I don’t actually stand that straight, so once I sewed them on, they were far too loose when I naturally slouched a little. So make sure you test our your strap length a couple times before you sew them on.
Final Thoughts
Overall I really enjoyed this pattern/ garment. The fact that it was mix and match as really fun and easy to follow. I mean part of making your own clothes is to make them super customized to your style right? So this is the perfect kind of pattern to make something that is true to you!
Although McCall’s patterns are a little more pricey, I really loved all of the detail of the pattern and the quality of the finished garment as well, so I will definitely be getting more of their patterns in the future!
If you are thinking of trying this pattern out, I hope any amount of this information helped you out!
If you read my last post you will know that I have been going through a bit of a creative slump lately (honestly when aren’t I though?). Every time this happens I feel like the reasons can vary, if I can even pin them down in the first place (sewing pun intended). However, along with the reasoning being different, the solution is often different as well.